

A well-colored sand background can instantly transport your illustration to a relaxing beach, a desert landscape, or a cozy outdoor scene. If you've ever struggled to achieve soft, natural-looking sand, this tutorial will guide you through an easy dot technique to add depth and texture!
Today, we’ll be working on a beach sand illustration from the Girl Spaces, a Southern Lotus Coloring Book featuring hand-drawn cozy and dreamy settings. Follow this 5-step tutorial using Ohuhu markers to create a 3D warm-toned sand effect.
- Ohuhu Markers (E160, E210, Y230, E280, E240, E260)
- White acrylic pen
- A coloring page featuring a sandy background (from Girl Spaces Coloring Book)
Step 1: Base Layer with E160
Begin by covering the entire sand area with a smooth first layer using E160. This creates a warm, golden base for your sand texture.

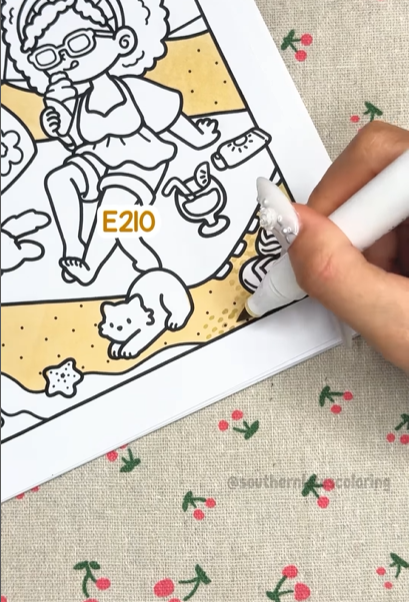
Step 2: Add Sand Texture with E210
Take E210, a darker shade, and use a dotting technique to add random sand grains across the base layer. This step builds texture and natural variations in the sand.
Tip: Keep your dots scattered and unevenly spaced for a more organic look.
Step 3: Layer the Sand with Y230 & E280
Now, take Y230 (a dreep cream tone) and E280 (a soft brown), and use the same dotting technique to create subtle variations in the sand.

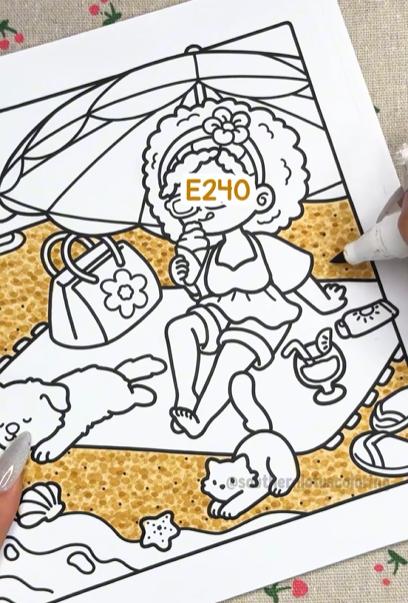
Step 4: Add Details with E240
Using E240 with a fine-tip, randomly dot across the sand to enhance the texture and add more definition.
Tip: Be light-handed with this step to avoid making the texture too rough.
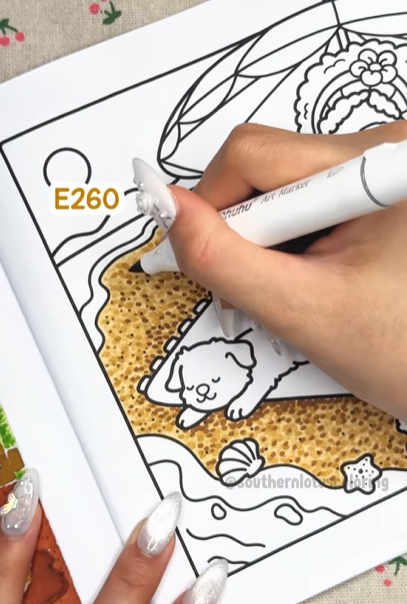
Step 5: Add Shadows with E260
Now, take E260 and add shadow dots to deepen the contrast in certain areas, like around footprints, sand dunes, or edges of objects.
Tip: More dots = deeper shadows. Adjust the density of your dots accordingly.
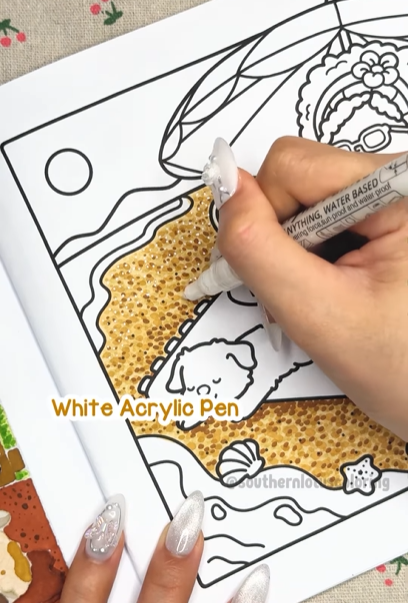
Step 6: Highlight with a White Acrylic Pen
Finally, use a white acrylic pen to add subtle highlights where the sun would naturally hit. This step enhances the 3D effect and makes the sand look more realistic and sun-kissed.
Tip: More dots = deeper shadows. Adjust the density of your dots accordingly.
A Beautiful, Sunlit Sand Scene!

With layered colors, soft blending, and a simple dot technique, your beach sand now looks textured and natural! This method works perfectly for beach landscapes, picnic settings, and warm, cozy scenes.
For more detailed tutorials, you can check out our Instagram.
Enter your email to get our special. Gift straight to your inbox.