

Blending green is one of the most fun techniques in alcohol marker coloring and a favorite among artists who love cute coloring pages, aesthetic coloring books, and beginner-friendly coloring tutorials. Green tones are incredibly versatile from soft mint to vibrant lime to deep forest making them perfect for creating glowing balloon effects in coloring books, kawaii art projects, and smooth alcohol marker gradients.
In this tutorial, you’ll learn a simple, effective way to blend multiple green shades into a soft, luminous finish. This guide is ideal for anyone practicing alcohol marker shading, smooth blending techniques, or cute aesthetic coloring.
To achieve clean, smooth blending, here are the recommended tools:
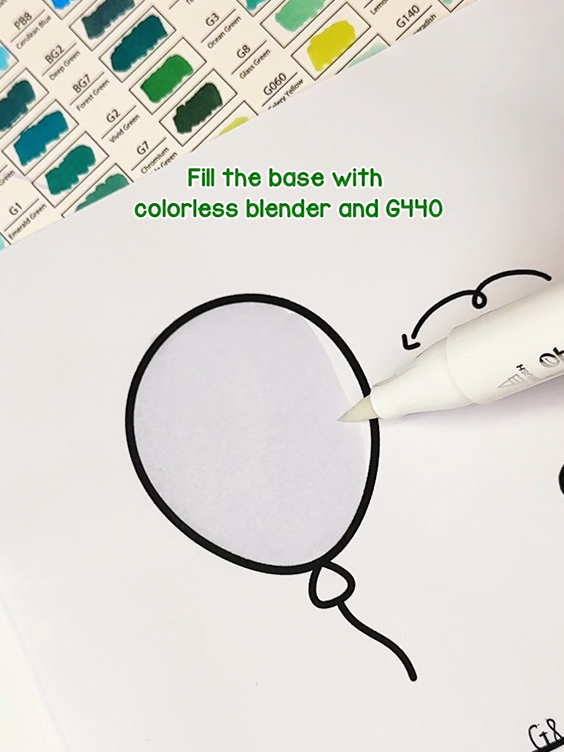
Start by applying a full layer of Colorless Blender across the balloon. This keeps the paper wet longer, giving you smoother transitions, a key to blending in alcohol marker tutorials and coloring book practice pages.
Next, lightly shade the outer edges with G440, leaving the center clean. This helps establish a natural highlight area and sets the foundation for the glowing balloon effect often seen in cute coloring books and aesthetic marker art.
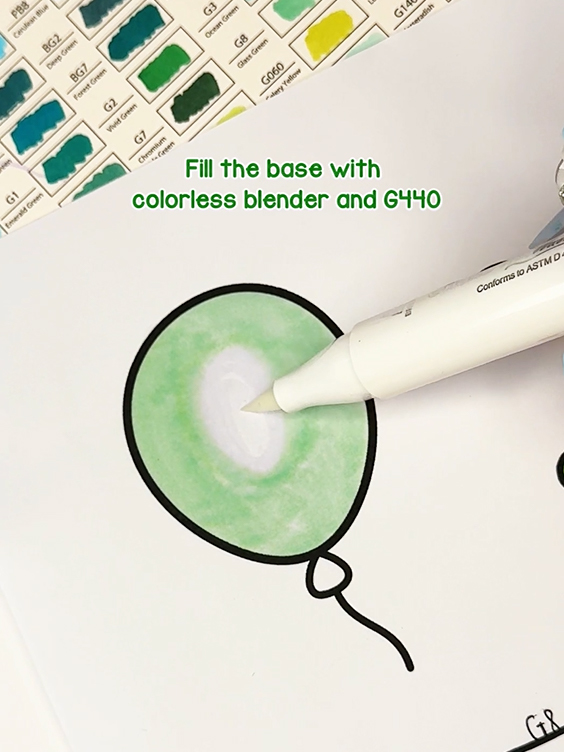
Add a second layer of G440 using gentle circular motions. This evens out the base and prepares your surface for deeper colors. Do not worry if it looks a little patchy, layering is the secret to professional looking blends in marker coloring books and alcohol marker tutorials.
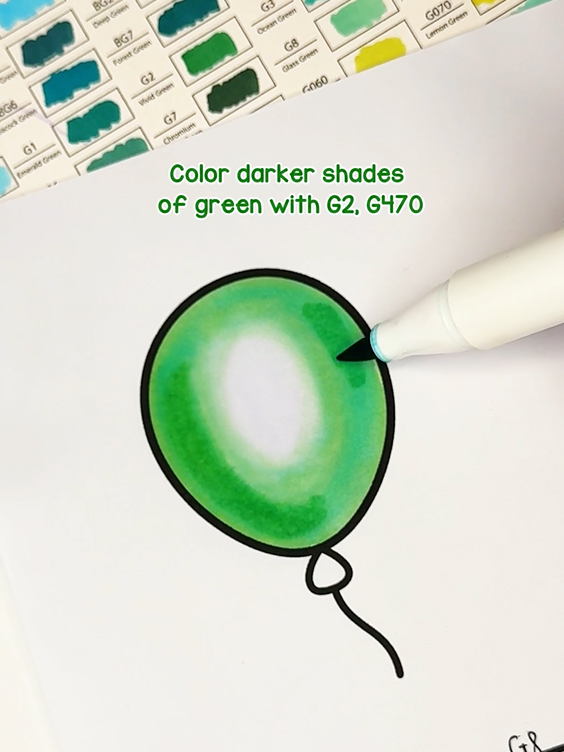
Now deepen your shadows using G2 and G470. Follow the curved edge of the balloon to create a natural rounded shape and keep your strokes soft and rounded. This step builds the three dimensional look often found in aesthetic coloring books, kawaii coloring pages, and other cozy marker art projects.

Use G120 to soften the transition between the darker greens and the lighter central area. Then return with G440 to gently blend over the edges where the midtone meets the highlight.
To finish, brush over the balloon with the Colorless Blender. This melts all the colors together and creates that soft, glowing gradient that works beautifully in cute coloring books, aesthetic balloon illustrations, and beginner friendly marker practice sheets.
If you want an easier way to practice your green blending, we’ve prepared a free practice PDF just for you. Simply download it, print it (or color it on your iPad), and warm up your green shades before working on your main coloring pages.
If blending green still feels tricky, don’t stress. I recorded the whole process so you can follow every stroke on Instagram. It’s way easier when you watch it in action!
Enter your email to get our special. Gift straight to your inbox.
