
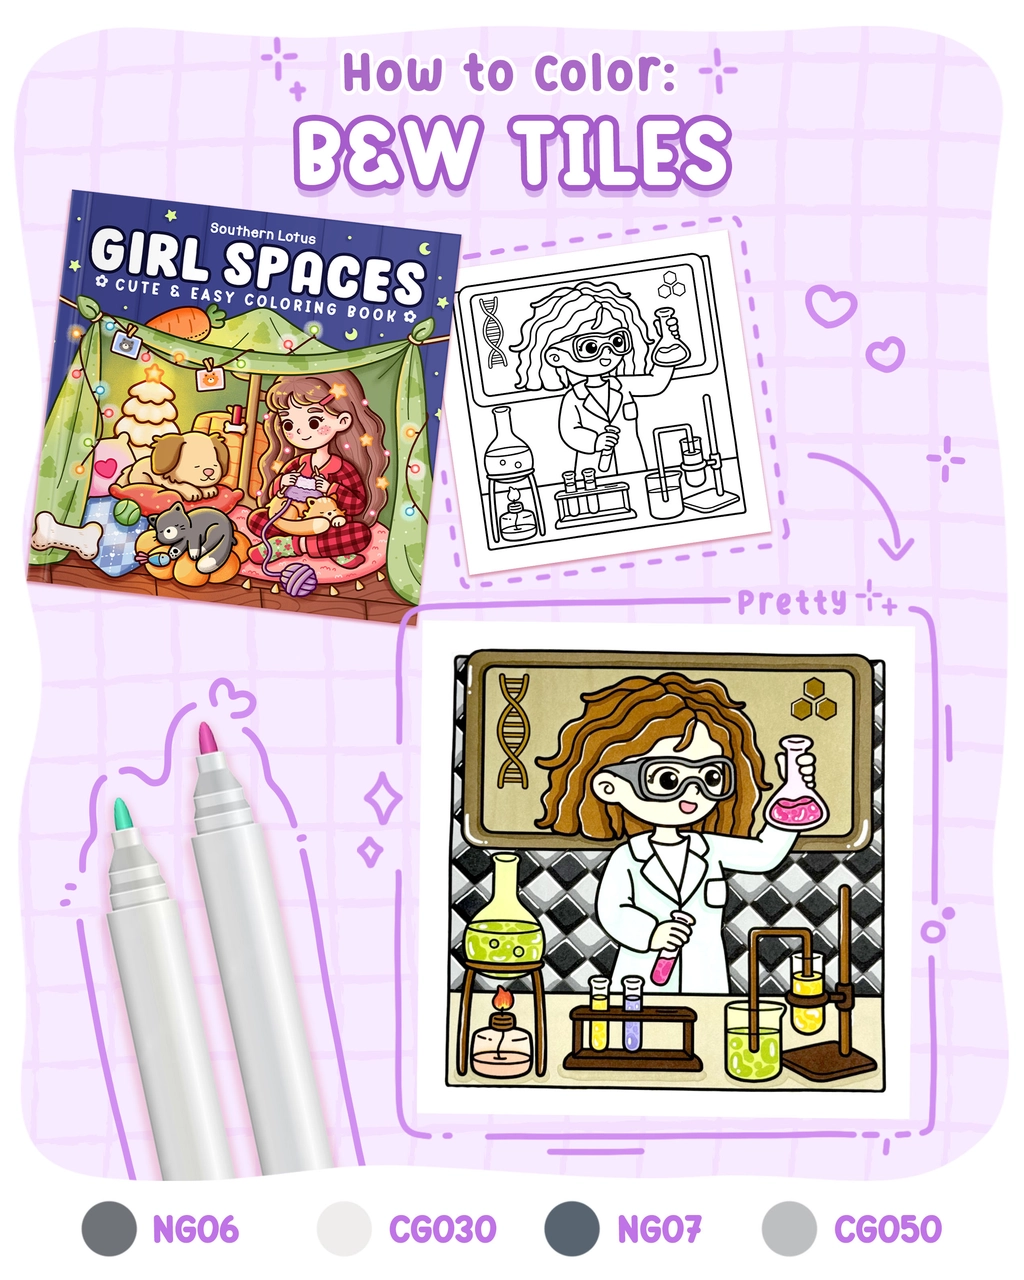
A black and white tile pattern is a timeless and elegant design, often seen in vintage floors, modern decor, and geometric artwork.
In this tutorial, we’ll guide you through 4 simple steps to create a 3D tile effect using Ohuhu markers. The page we’re coloring today comes from the Girl Spaces, a Southern Lotus Coloring Book featuring cozy, creative spaces.
- Ohuhu Markers (NG06, CG030, NG07, CG050)
- White Gel Pen
- A coloring page featuring a wall background (from Girl Spaces Coloring Book)
Step 1: Draw a Frame for the Tiles
Start by sketching the tile pattern using a pencil or fine liner. A classic black-and-white tile design is usually made of diamond-shaped squares, arranged in an alternating pattern.
/step1.png)
Step 2: Fill in Two Alternating Colors
Using NG06 (black) and CG030 (light gray), fill in the drawn squares in a checkerboard style. This alternating color scheme creates the base tile pattern.
/step2.png)
Step 3: Add Shadows for a 3D Effect
To give your tiles realistic depth, add shadows at the bottom edge of each square using NG07 (dark gray) and CG050 (medium gray). This simple shading trick creates a subtle elevation effect, making your tiles look more dimensional.
/step3.png)
Step 4: Highlight for Extra Realism
For a polished look, add highlights at the opposite edge of each shadow using a white gel pen. This contrast between shadow and highlight makes your tile pattern pop off the page.
/step4.png)
Your 3D tile pattern is now complete!
/final.png)
The contrast between the black and white tiles creates a sleek, sophisticated look, perfect for modern or vintage-inspired art.
If you love geometric designs and elegant patterns, check out Girl Spaces Coloring Book, available on Southern Lotus Coloring’s website and Amazon.
For more detailed tutorials, you can check out our Instagram.
Enter your email to get our special. Gift straight to your inbox.