
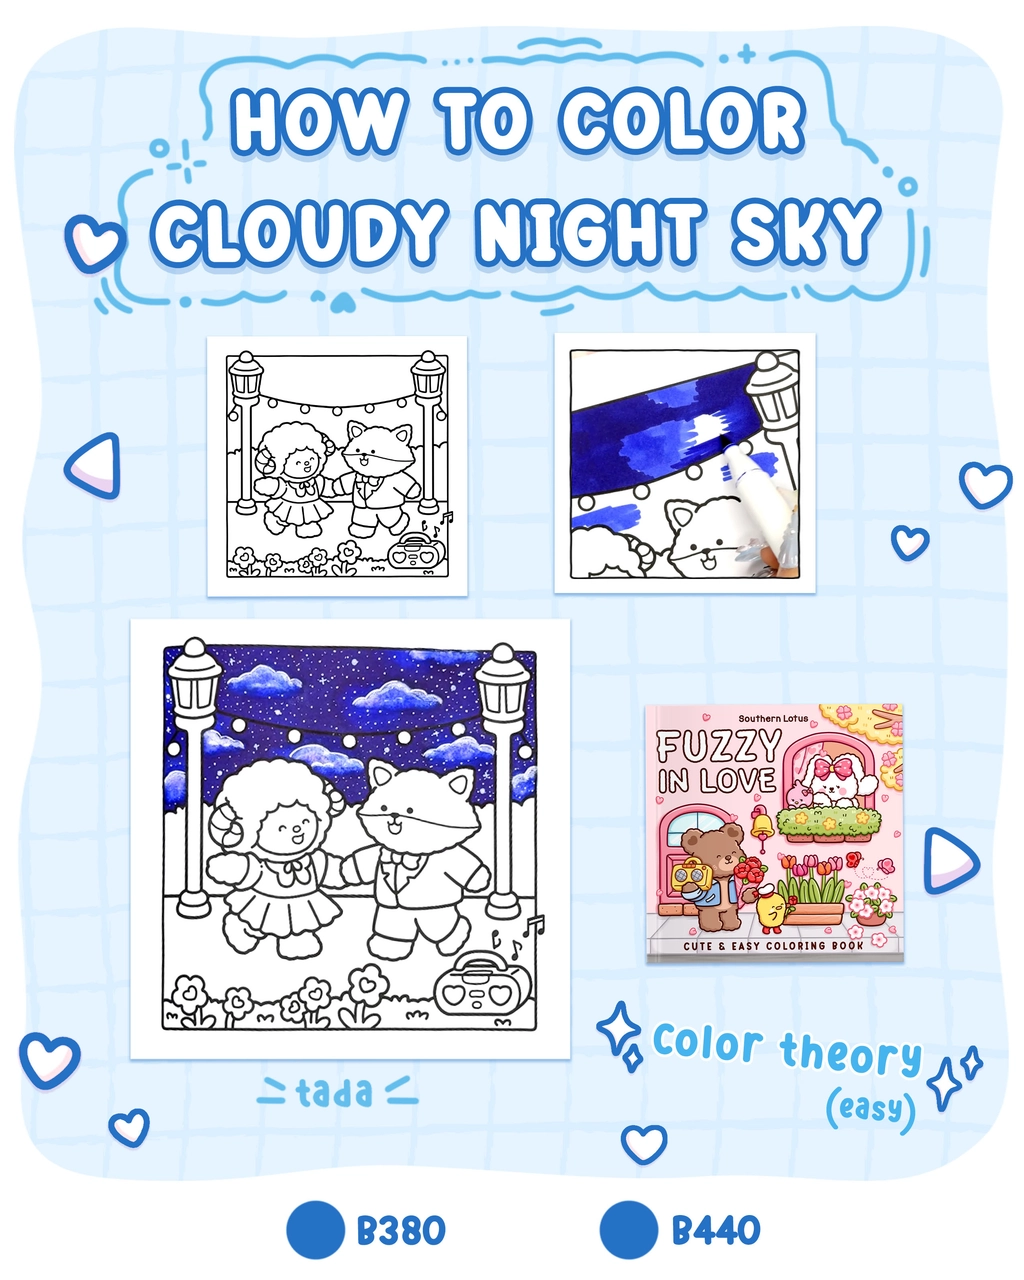
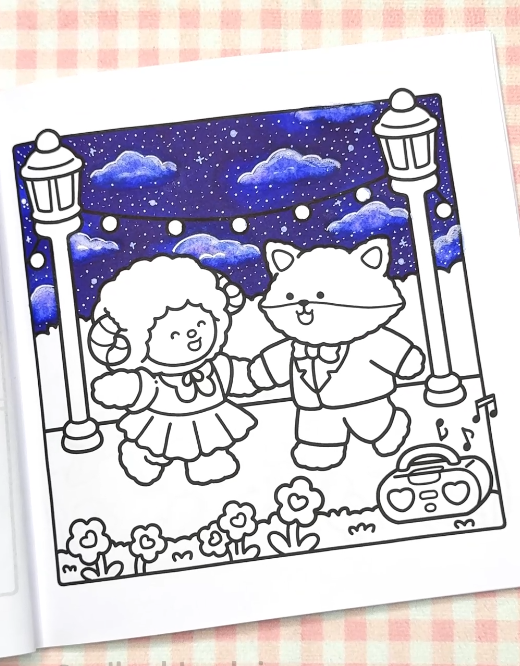
Creating a cloudy night sky in your coloring projects adds depth and atmosphere to your artwork. In this tutorial, we'll use a page from the "Fuzzy In Love" coloring book by Southern Lotus Coloring Book to demonstrate effective techniques for coloring a starry and cloudy night sky. By following these steps, you'll learn how to blend colors, create cloud textures, and add stars to enhance your night sky illustrations.
- "Fuzzy In Love" Coloring Book by Southern Lotus Coloring Book
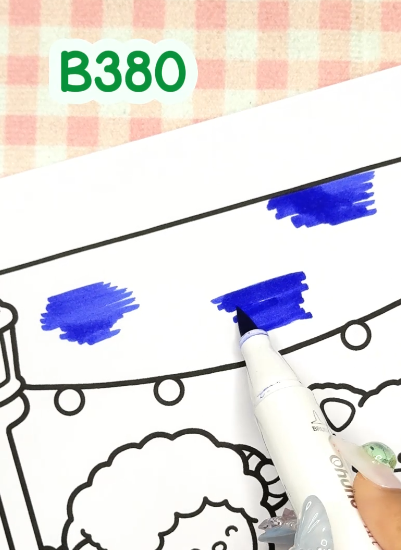
- Ohuhu Markers (B380, B440)
- Colorless blender
- White gel pen
- White acrylic pen
Begin by using the B380 marker to draw random horizontal color splashes across the sky area. This establishes the foundation for the darker areas of the night sky.
Next, use the B440 marker to cover the remaining sky areas, applying it in the same horizontal stroke technique as in Step 1. This creates a seamless blend between the two shades of blue, adding depth to the night sky.
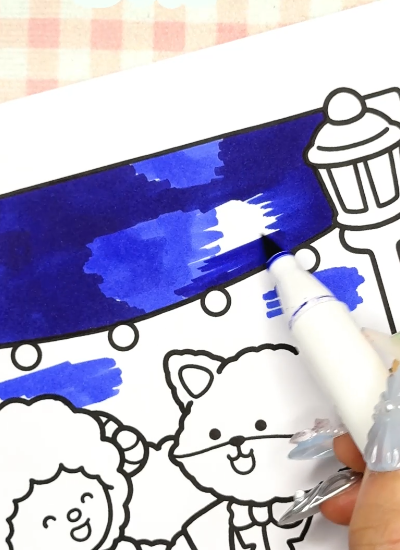
To achieve a smoother gradient, apply another layer of both B380 and B440 over their respective areas. This step deepens the colors and ensures a well-blended transition between shades.
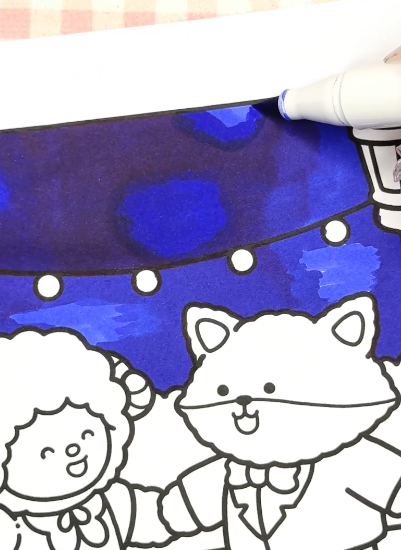
Using a colorless blender, gently apply it in circular motions to lift some of the blue ink, forming cloud-like shapes in the sky. This technique adds a realistic cloudy effect to your night scene.
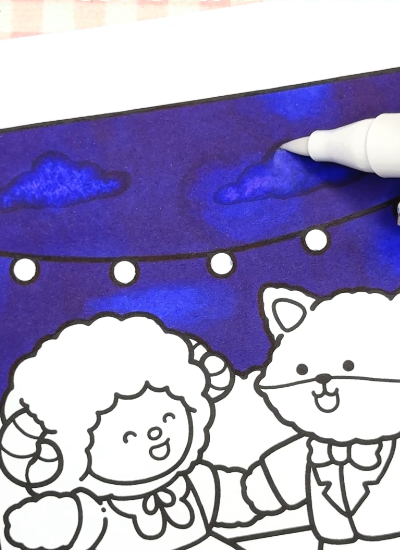
To accentuate the clouds, use a white gel pen to add highlights along the edges of the cloud shapes. Gently blend these highlights with your finger to achieve a soft, natural look.
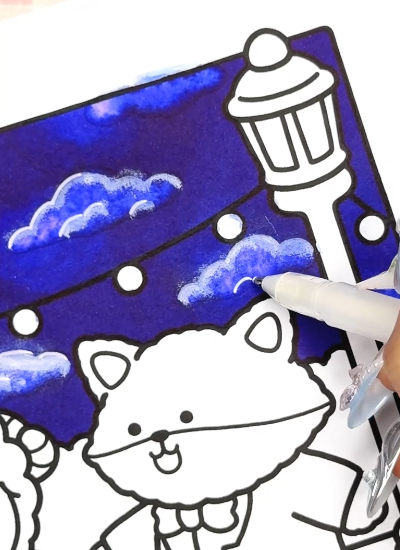
For the final touch, use a white acrylic pen to add random stars throughout the sky. Vary the sizes and placements to create a natural, starry night effect.

By following these steps, you've created a starry and cloudy night sky that adds depth and ambiance to your illustration. The combination of blending techniques, cloud textures, and star additions brings your night scene to life, enhancing the overall impact of your artwork.
If you enjoyed this tutorial and wish to further develop your coloring skills, consider exploring additional resources and guides on Instagram Southern Lotus.
Enter your email to get our special. Gift straight to your inbox.