

Creating a realistic brick wall in your coloring projects adds depth and authenticity to your artwork. In this tutorial, we'll use a page from the "Fuzzy In Love" coloring book by Southern Lotus Coloring Book to demonstrate effective techniques for coloring brick walls. By following these steps, you'll learn how to apply base colors, add shadows, and blend hues to achieve a natural look in your illustrations.
- "Fuzzy In Love" Coloring Book by Cottage Vibes Coloring Book
- Ohuhu Markers: BR3, E280, GG3, E080, E300, GG5, 120 - Black
- White gel pen
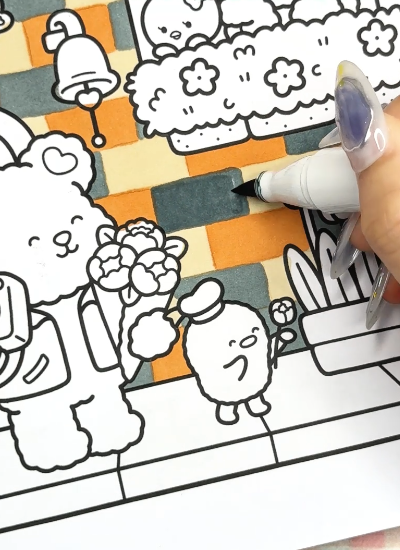
Begin by coloring the bricks in an alternating pattern using the BR3, E280, and GG3 markers. This variation in color adds realism and texture to the wall, mimicking the natural differences found in brick materials.
BR3-Based Bricks: Use the E080 marker to add shadows, then blend with BR3 and E080 for a seamless transition.
E280-Based Bricks: Apply E300 for shadowing, blending with E280 and E300 to achieve depth.
GG3-Based Bricks: Utilize GG5 for shadows, blending with GG3 and GG5 to create a cohesive look.
Adding shadows to each brick enhances the three-dimensional effect, making the wall appear more lifelike.
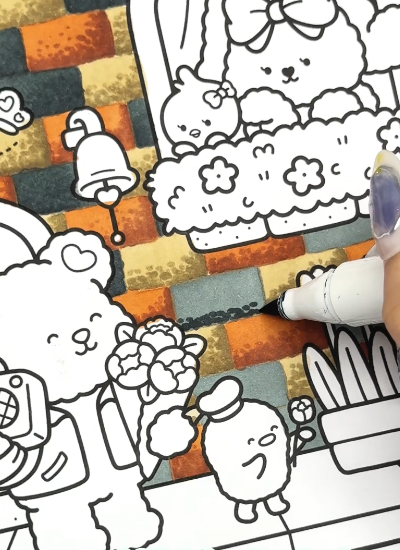
Use a 120 - black color marker to re-trace the outlines of each brick. This step sharpens the edges and defines the individual bricks, contributing to the overall realism of the wall.
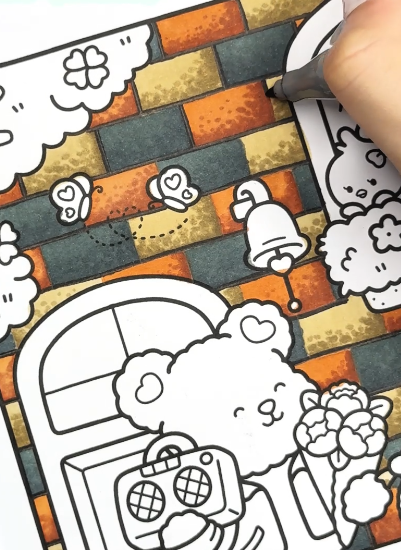
Introduce character to the brick wall by drawing random cracks using E310, E450, and GG9 markers. These imperfections add authenticity and suggest age and wear in the structure.
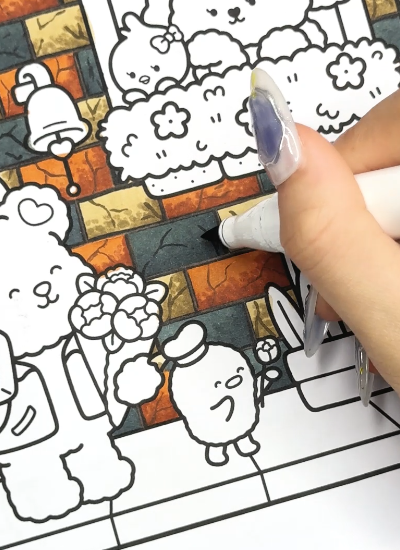
To emphasize the cracks and add contrast, use a white gel pen to highlight certain areas. This technique brings attention to the texture and enhances the visual interest of the wall.

By following these steps, you've created a realistic 3D brick wall that adds depth and character to your illustration. The combination of alternating colors, strategic shadowing, and detailed highlighting brings the brick wall to life, enhancing the overall impact of your artwork.

If you enjoyed this tutorial and wish to further develop your coloring skills, consider exploring additional resources and guides on Instagram.
Enter your email to get our special. Gift straight to your inbox.