

A coloring page becomes much more vibrant when the background isn't just a single, flat color. Instead, you can add a cracked texture effect to create depth and realism.
In this guide, we'll learn how to color a cracked texture by using a cute coloring page from the Little Friends Coloring Book by Southern Lotus.
This technique not only helps you create an impressive background but also gives your artwork a nostalgic, profound feel.
Step 1: Sketch Random Cracks with a Pencil
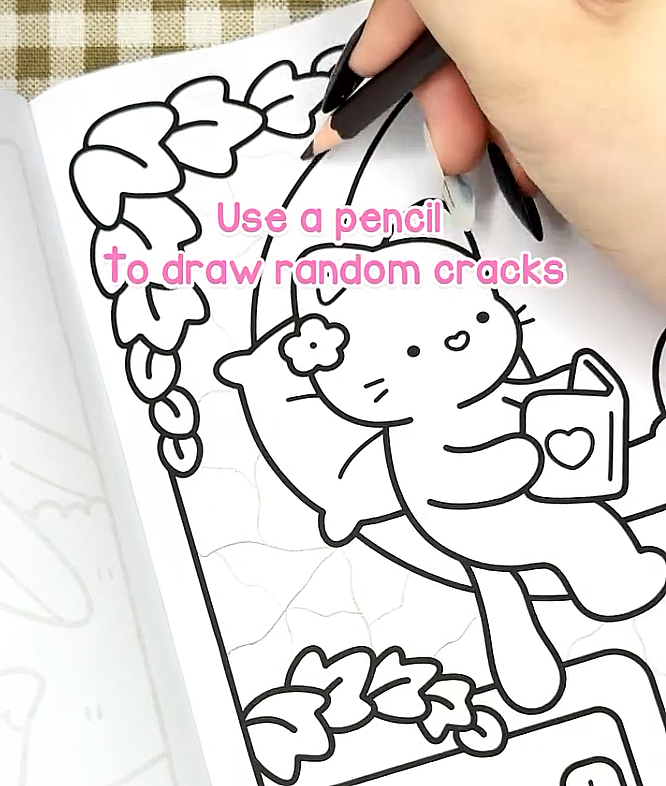
The first step in this cracked coloring guide is to sketch the cracks.
Use a pencil to draw random lines on the surface you want to color. The purpose of this step is to create a map for the cracks, making it easy to visualize and separate the coloring sections later on.
You should draw lines of varying widths, lengths, and shapes to give the old wall a more natural look. These random lines will serve as the skeleton for a realistic cracked wall, helping it look more natural.
Step 2: Fill the Base Layer with BG060
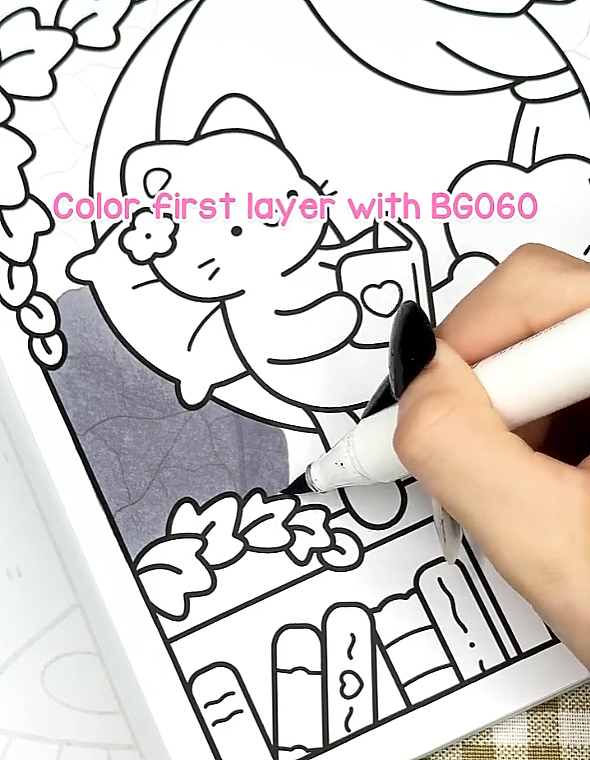
After sketching, we'll move on to coloring the base layer and adding shadows. Use the BG060 alcohol marker to apply a thin, even layer over the entire area. Pay attention to coloring more intensely along the edges and near the crack lines.
A little tip here is that you don't need to color perfectly; leaving a few uneven streaks will actually enhance the antique feel of the wall. This is a crucial step in how to color a wall for a realistic effect.
Step 3: Define Cracks & Add Shadows (Black Acrylic + CG5)
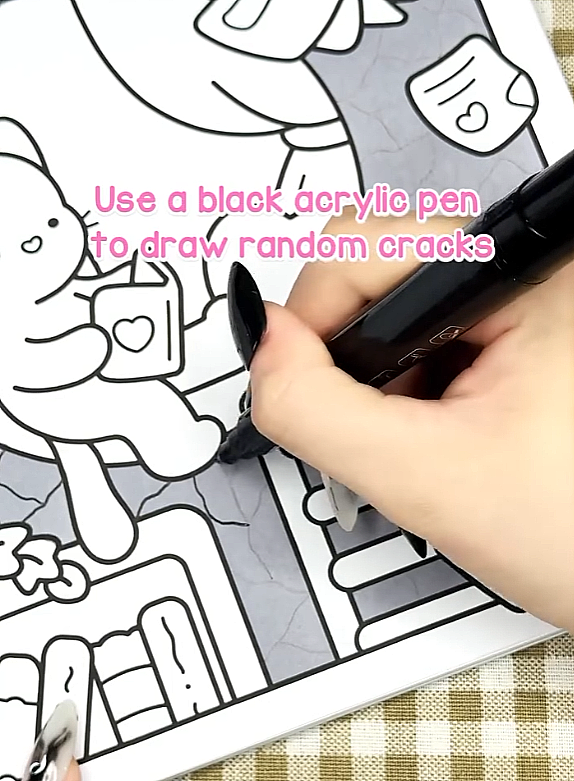
Next, we'll start defining the main cracks. The combination of bold black lines and light gray shadows creates a 3D illusion, turning the flat lines into deep grooves on the wall.
Use the black acrylic pen to trace over the pencil lines you sketched. The black line will make the cracks clear and sharp, creating a strong contrast with the base layer.
This technique is not just how to color cracked texture, but also helps separate the color sections and emphasize the overall texture. Choose a fixed light source (for example, light from the left). This way, all shadows will be consistent, creating a logical look.
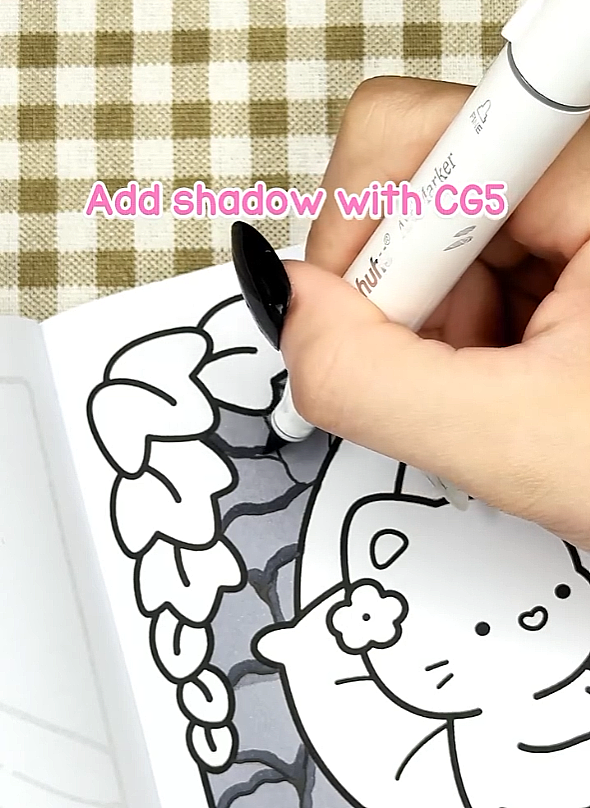
Afterward, use the CG5 marker to add shadows to the cracks. Color a thin, even line along one side of each crack to create a sense of depth, just like a shadow cast on the wall's surface.
You can draw thin or slightly thicker lines to make the cracks look more realistic, as if some are large cracks and others are just small fissures.
Use this marker to shade one side of the crack (e.g., always on the left or right). This helps the cracks look deeper and more three dimensional.
Step 4: Add Highlights & Small Details (White Gel + Black Acrylic)
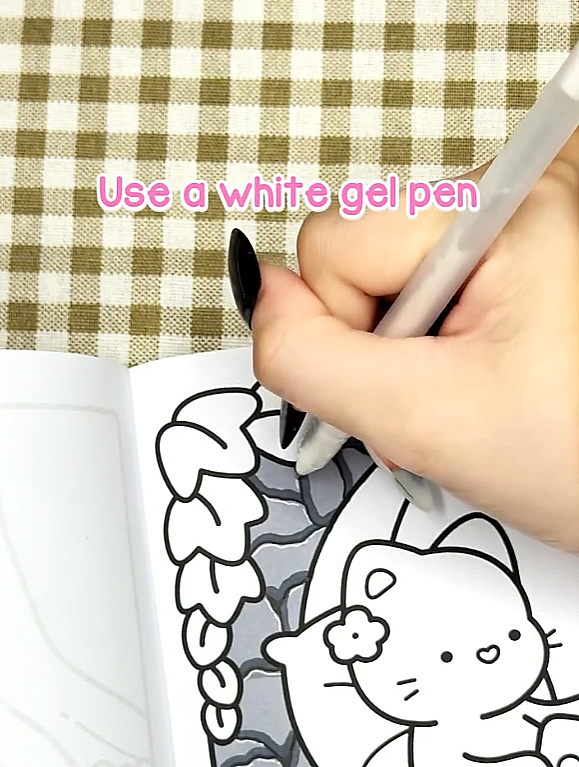
Using the white gel pen, add highlights or thin white lines along some of the cracks. This gives the cracks depth and makes them look more realistic.
You should only add a few white highlights and avoid overdoing it, as this can take away from the natural look of the cracks.
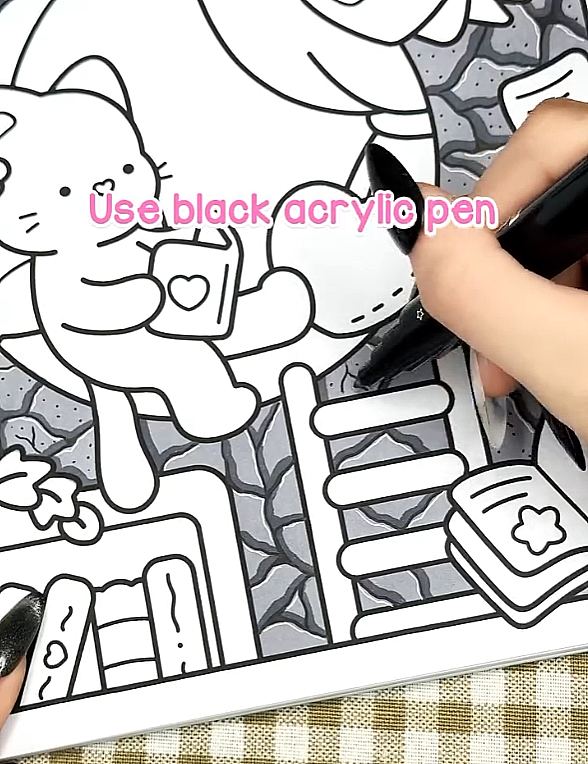
Afterward, use the black acrylic pen to draw small, thin cracks and tiny dots within the wall sections. These details will enhance the realism and rough texture of the background.
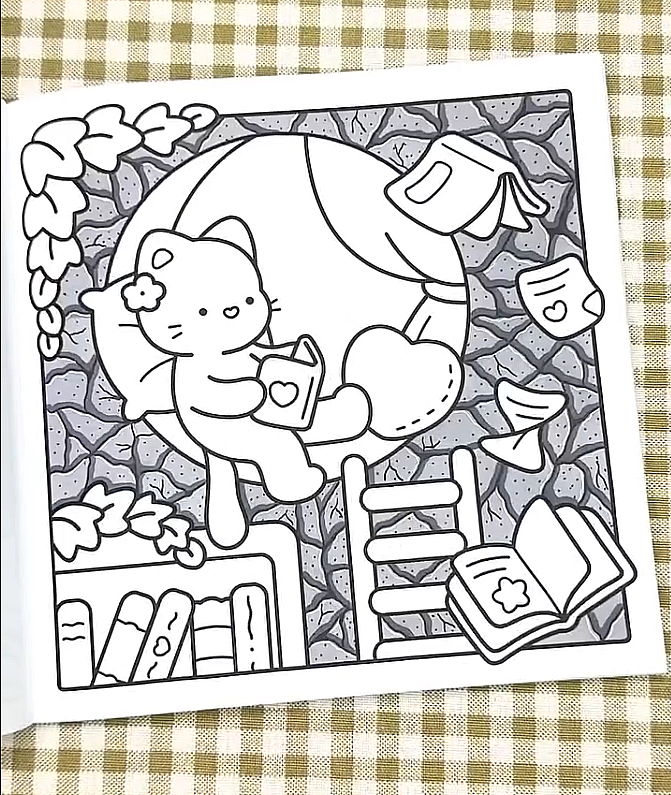
The final result shows clear, deep cracks with a very realistic 3D effect. This is a simple texture coloring guide that can be applied to any coloring page featuring a wall, rock, or background that needs a strong, gritty feel.
This page is currently available as a free coloring page download. Try it out today, and if you enjoy it, experience the full Little Friends Coloring Book for more adorable scenes!
If you'd like to see more details, watch the video coloring tutorial on Instagram.
Enter your email to get our special. Gift straight to your inbox.