
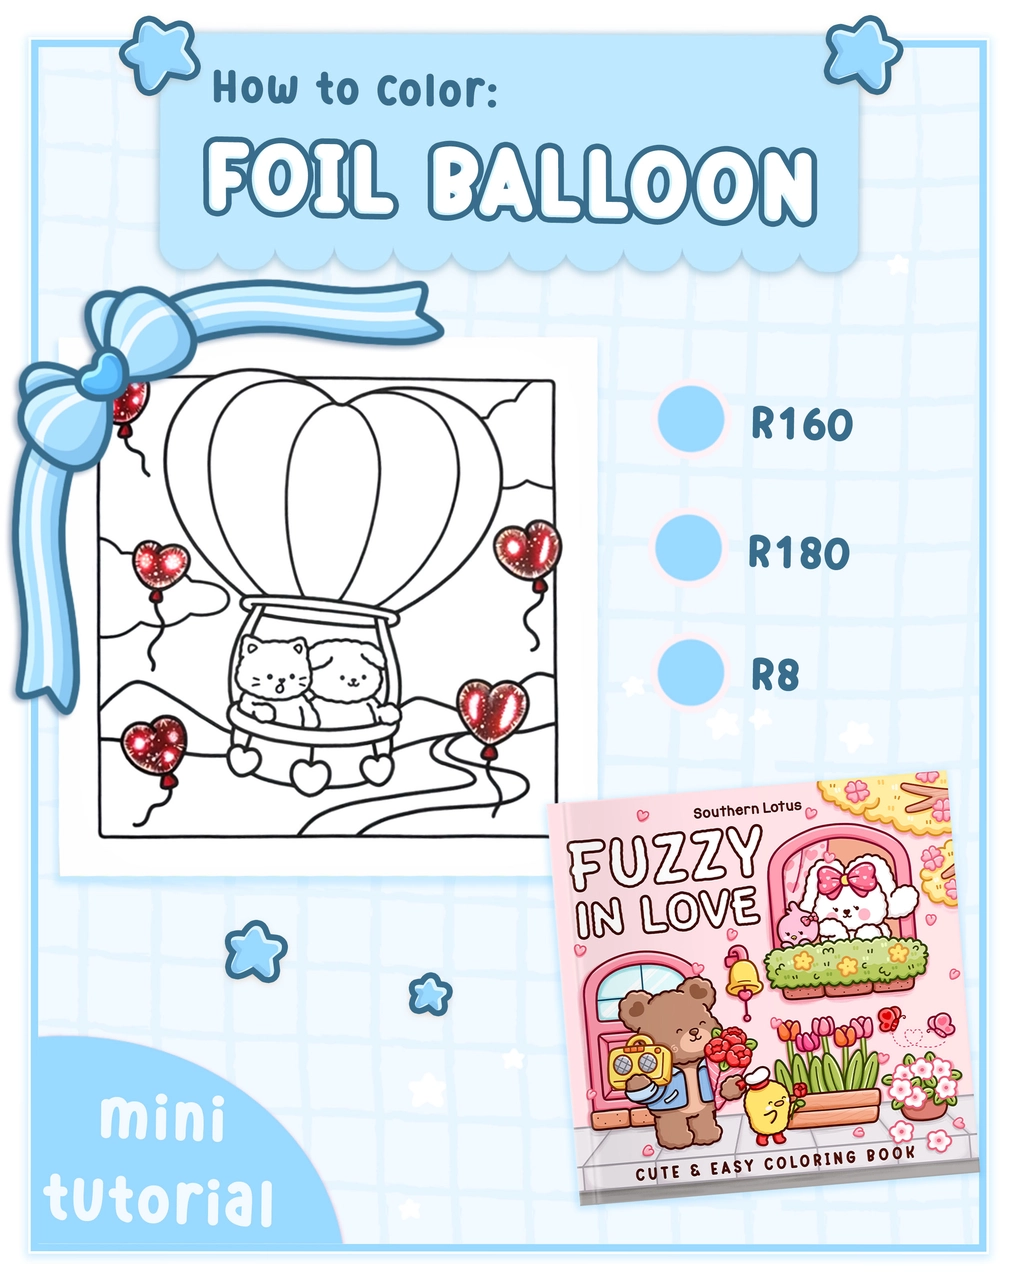
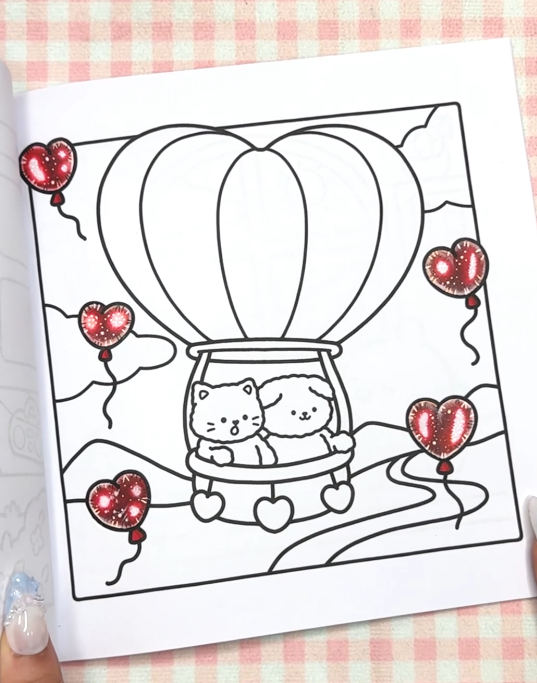
A foil balloon can bring a shiny and festive vibe to your coloring pages! Today, we’ll be working on a page from "Fuzzy In Love", illustrated by Southern Lotus Coloring Book, to create a realistic foil balloon design using Ohuhu Markers. Follow this step-by-step tutorial to achieve a metallic, 3D look that is perfect for creative and celebration-inspired designs!
- Fuzzy In Love Coloring Book by Southern Lotus Coloring Book
- Ohuhu Markers (R160, R180, R8)
- Colorless blender
- White and black gel pens
Begin by using a colorless blender to draw two organic shapes in the middle of the balloon. These shapes will act as the highlight spots, giving the balloon a realistic foil effect.
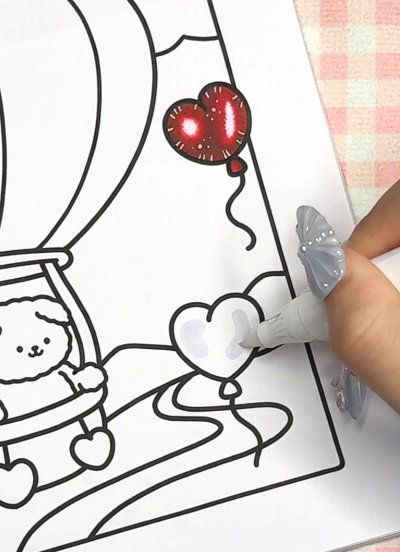
Use R160 to apply the first layer of color on the balloon, leaving the highlight areas untouched. This helps to maintain a bright reflection spot, which is crucial for the foil balloon's shiny look.
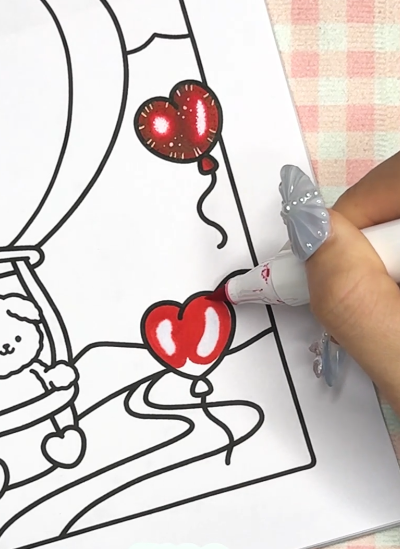
With R180 and R8, add darker shades to the edges of the balloon. The darker tones enhance the 3D effect, making the balloon appear round and voluminous. Focus on creating soft shadows where the balloon would naturally curve inward.
Go over the colored areas again with the colorless blender, using gentle circular motions. This step helps to smooth the transition between colors, creating a natural gradient that enhances the foil effect.
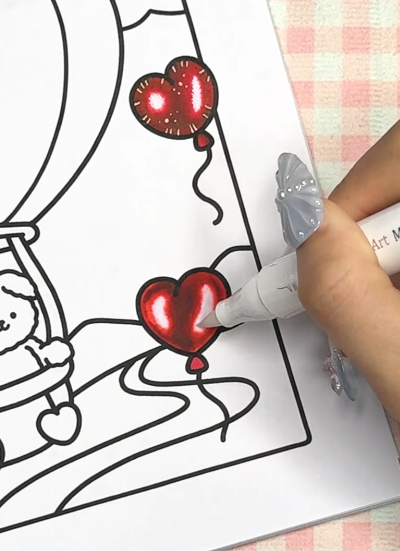
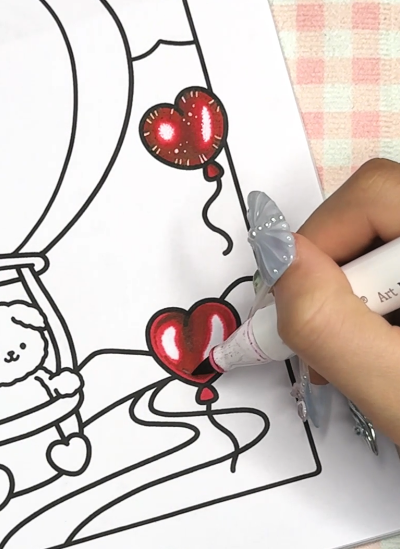
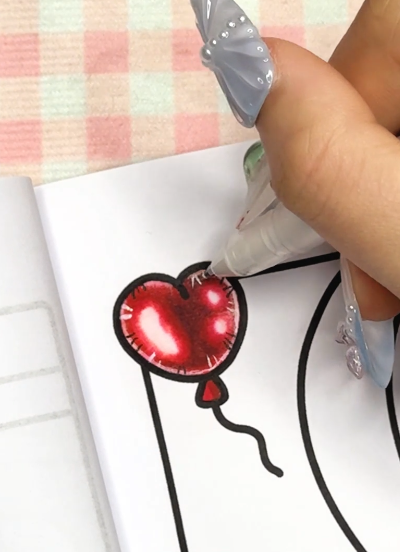
Use a white gel pen to draw along the balloon's outline. You can gently smudge the gel pen with your finger to soften the highlights, giving the balloon a more natural glow.
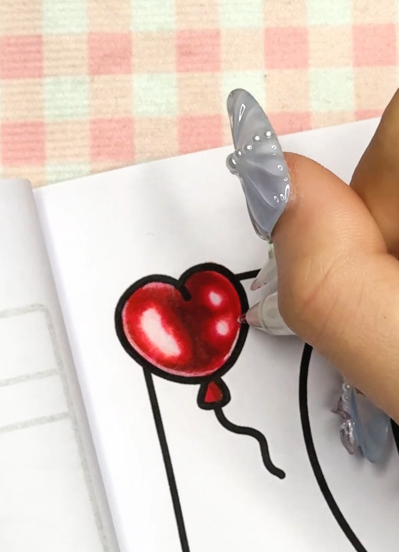
For the final touch, use both black and white gel pens to draw thin strokes from the balloon's edge toward the center. This technique mimics the tight, crinkled texture that is often seen in foil balloons, adding a realistic touch to your artwork.
Your page now features a beautiful and shiny foil balloon with a smooth, metallic effect that adds a celebratory and festive vibe to your coloring project. This technique is perfect for creating party-themed designs and pairs beautifully with the playful and joyful scenes in the Southern Lotus Coloring Book.
Love creating shiny and realistic designs? Follow Instagram Southern Lotus Coloring for step-by-step video tutorials on this and many other creative and metallic coloring techniques!
Enter your email to get our special. Gift straight to your inbox.