
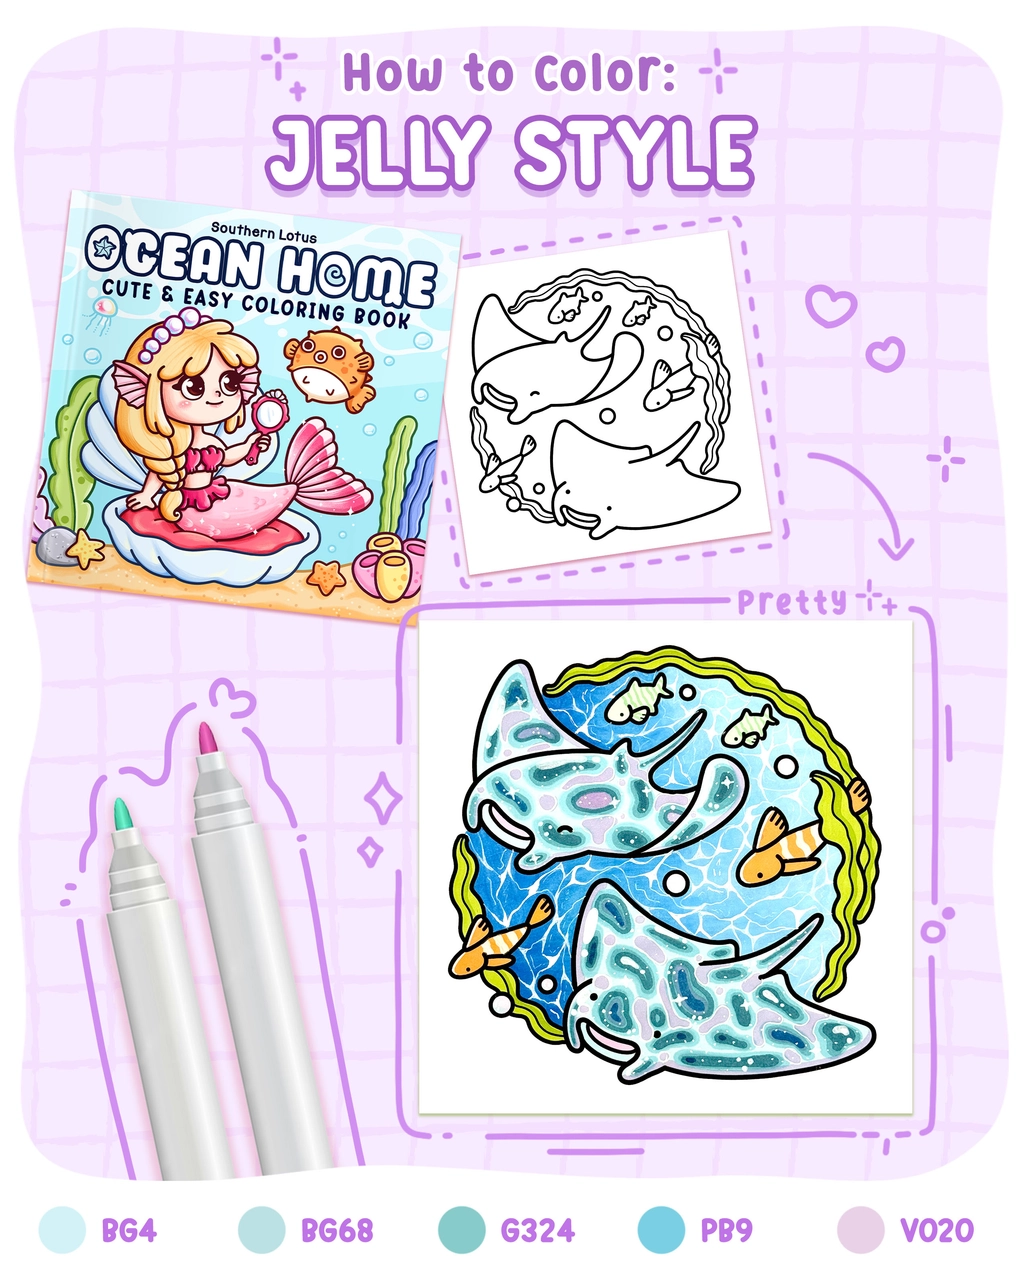
Jellyfish have a soft, fluid, and translucent appearance, making them a perfect subject for blending colors and creating a glowing effect. This technique will help you master 3D color effects and light reflections, making your coloring pages pop!
Today, we'll use a page with an underwater animal from the Ocean Home, a Southern Lotus Coloring Book featuring hand-drawn aquatic animals for a cute and relaxing coloring experience. In this tutorial, we’ll guide you through 6 simple steps to create a stunning transparent jellyfish effect using Ohuhu markers.
- Ohuhu Markers (BG4, BG68, G324, PB9, V020)
- White Gel Pen
- White acrylic pen
- A coloring page featuring a jellyfish (from Ocean Home Coloring Book)
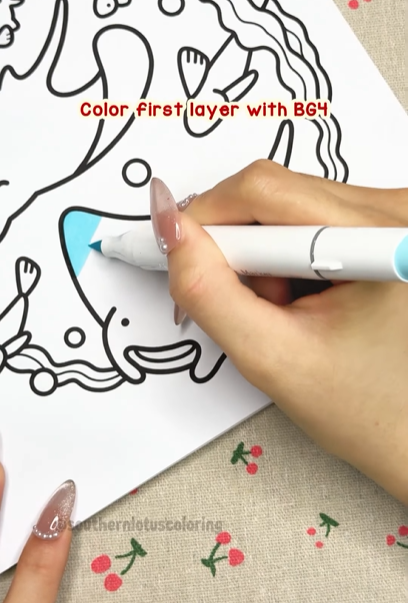
Step 1: Base Layer with BG4
Start by filling the entire jellyfish body with BG4. This will create a light base for the transparent effect.
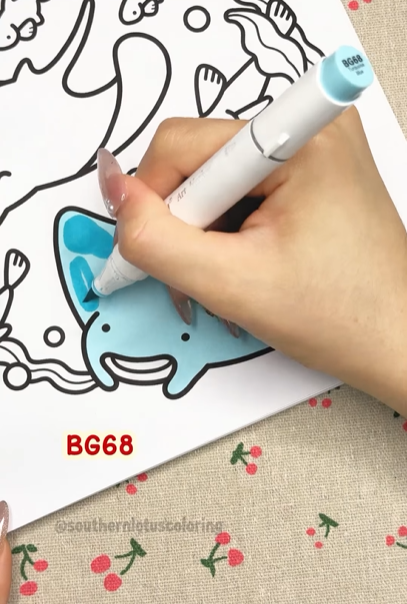
Step 2: Random Organic Shapes with BG68
Use BG68 to draw random organic shapes over the first layer. These shapes will act as the deeper, shadowed areas of the jellyfish’s body.
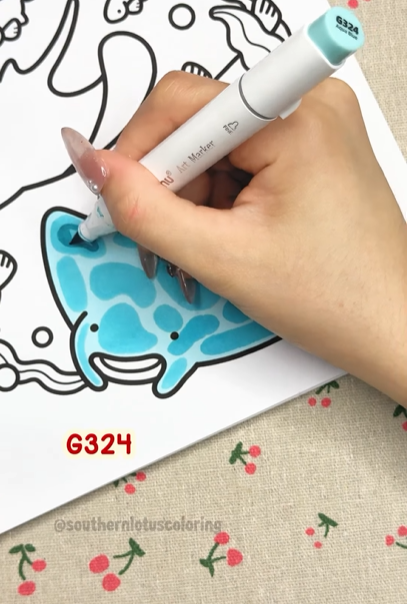
Step 3: Gradient Layers
Respectively use G324 and PB9 to add extra layers over the organic shapes from step 2. Ensure that each new shape is slightly smaller to create a smooth gradient transition.
Step 4: Soft Highlights
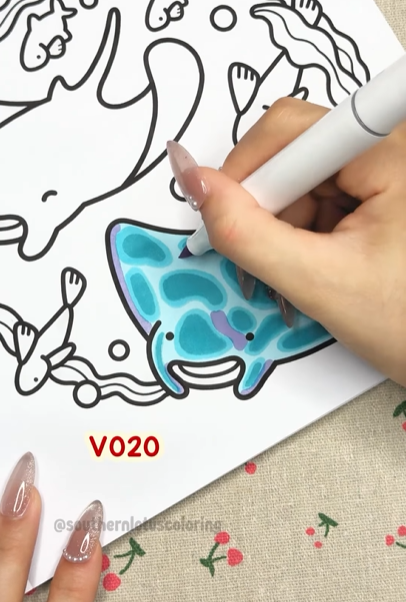
Use V020 to randomly fill in some of the blank areas with organic shapes, helping to enhance the transparency of the jellyfish.
Step 5: Outline for Definition
Outline the shapes from step 4 using a white gel pen to separate them from the background and add more definition.

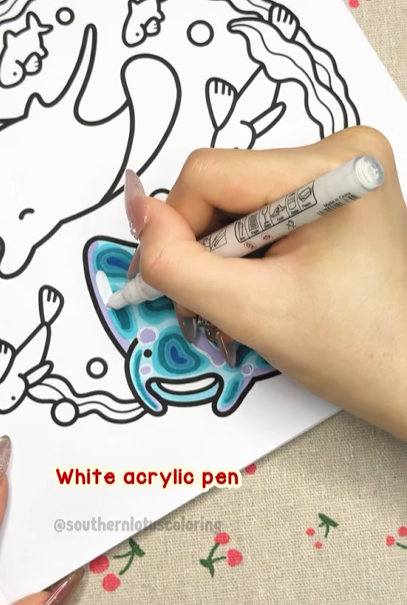
Step 6: Glow & Highlights with a White Acrylic Pen
Use a white acrylic pen to add highlights, glowing dots, and soft reflections, giving the jellyfish a luminous underwater effect.
Admire Your Jellyfish Art!
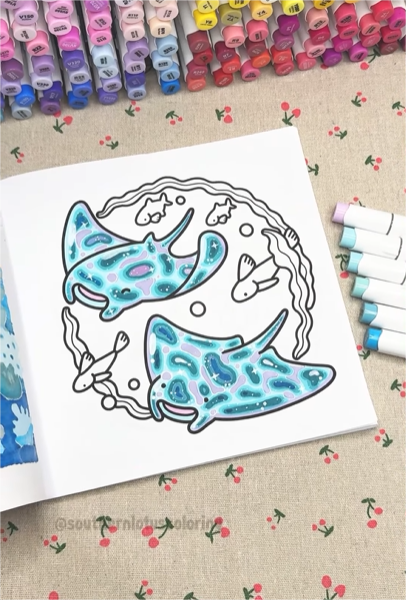
Your stunning, translucent jellyfish is now complete! The combination of blended colors and glowing highlights brings it to life, creating a beautiful floating effect in the ocean.
For more detailed tutorials, you can check out our Instagram.
Enter your email to get our special. Gift straight to your inbox.