
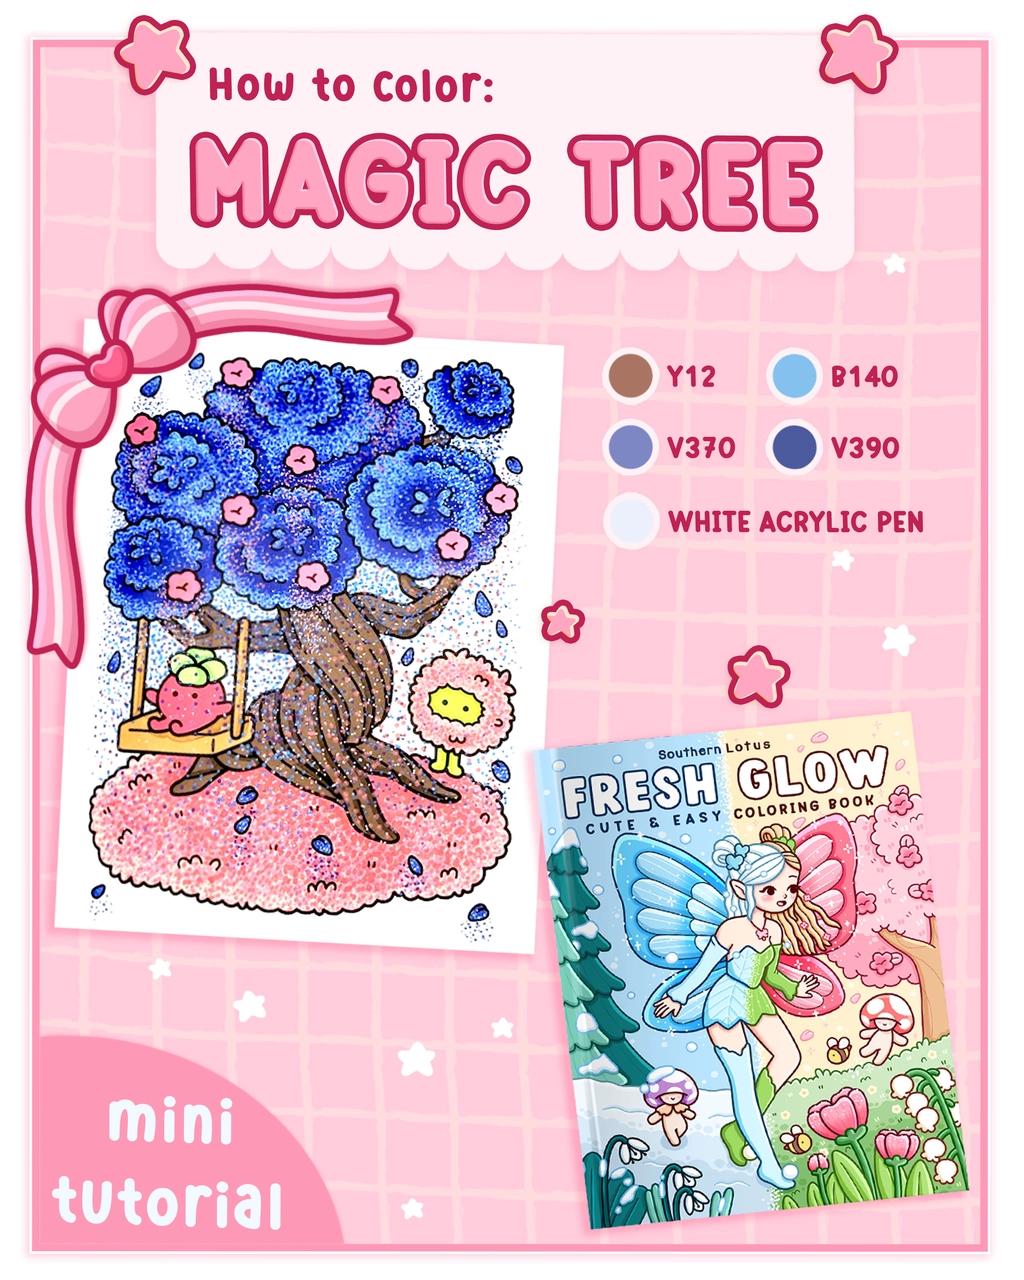
A magic tree gives off a soft, glowing light, making it an exciting subject for blending colors and creating luminescent effects. This technique will help you master light reflections and dreamy color transitions, bringing a fairy-tale atmosphere to your coloring pages.
This page is from the Fresh Glow, by Southern Lotus Coloring Book featuring hand-drawn enchanted landscapes for a cute and relaxing coloring experience. In this tutorial, we’ll guide you through 6 simple steps to create a stunning magical glowing tree using Ohuhu markers.
- Ohuhu Markers (Y12, B140, V370, V390)
- White acrylic pen
- A coloring page featuring a magic tree (from Fresh Glow Coloring Book)
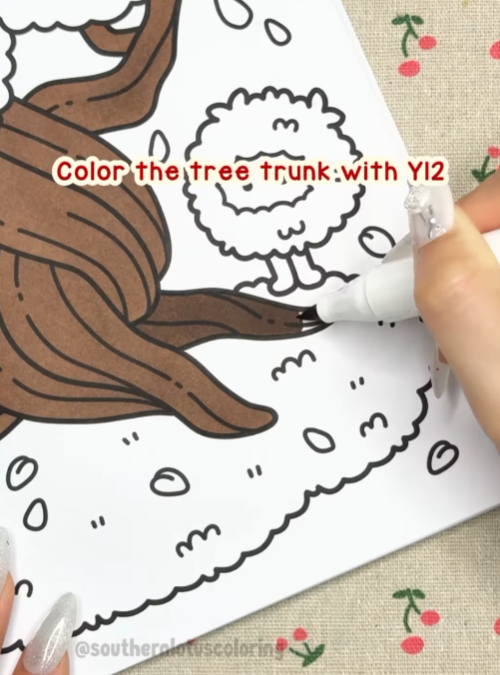
Step 1: Base Layer for the Tree Trunk
Start by coloring the tree trunk with Y12. This will serve as the foundation for the glowing effect.
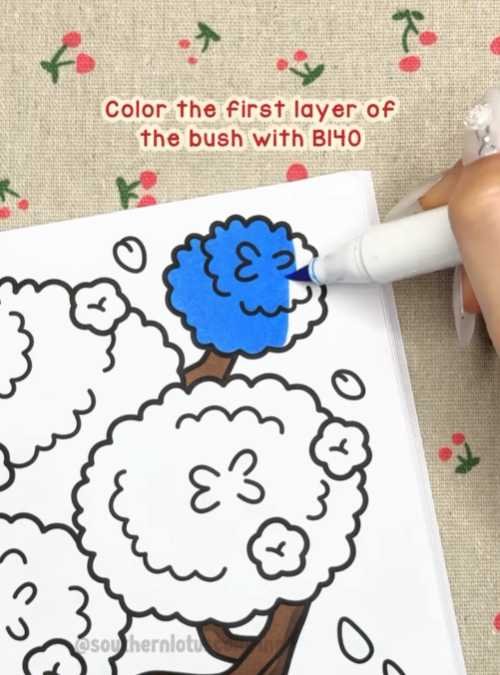
Step 2: First Layer of the Bush
Fill in the bushy tree top using B140, creating a soft, dreamy base.
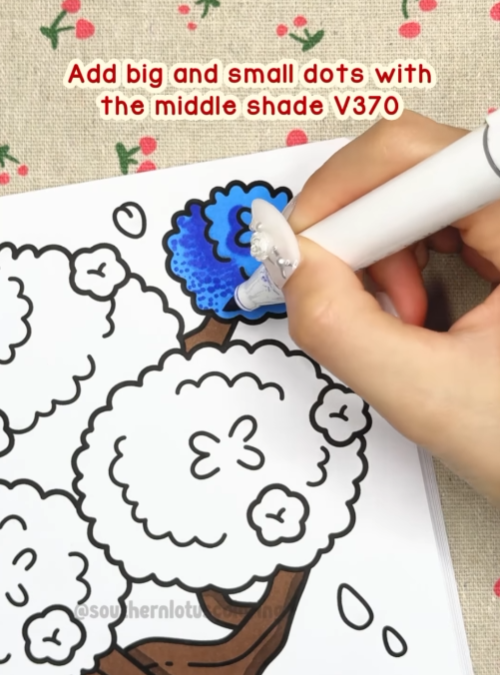
Step 3: Adding Depth with Dots
Use V370 to add big and small dots over the bush to enhance texture and create dimension.
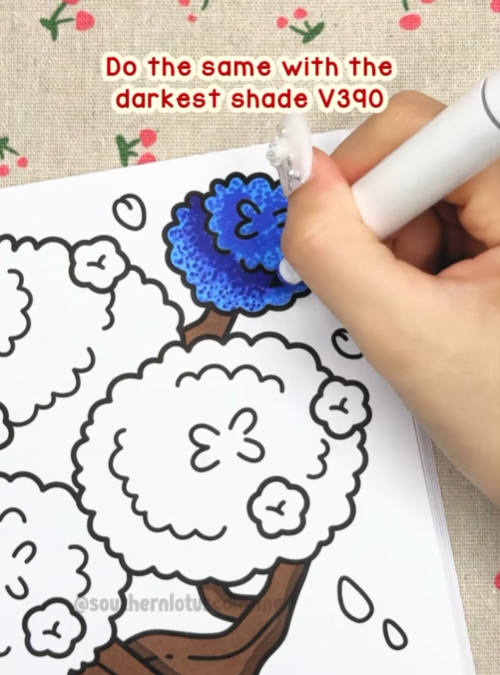
Step 4: Enhancing the Glow
Repeat the process from step 3 with the darker shade V390, building up depth and contrast.
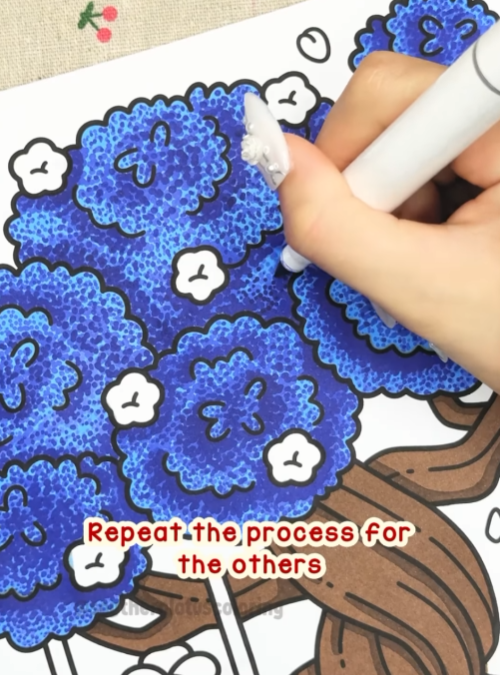
Step 5: Expanding the Glow Effect
Apply the same technique to the remaining sections of the tree, ensuring a smooth and even blend.
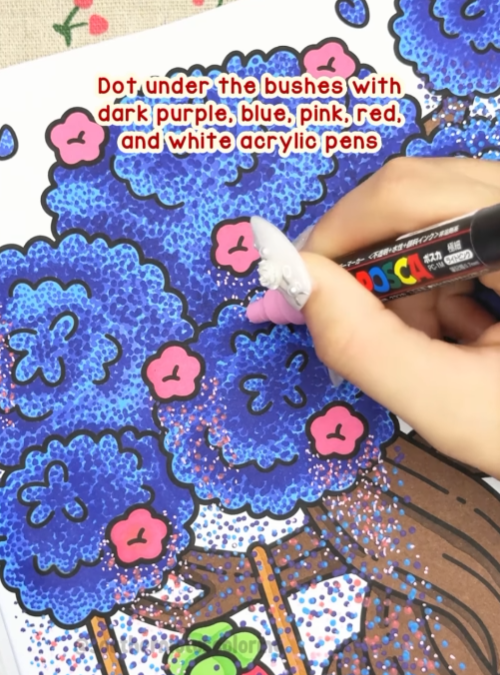
Step 6: Final Glowing Touches
Use white acrylic pens to dot underneath the bush with dark purple, blue, pink, and red. Add glowing white dots to emphasize the magical effect.
Your enchanting, glowing magic tree is now complete!
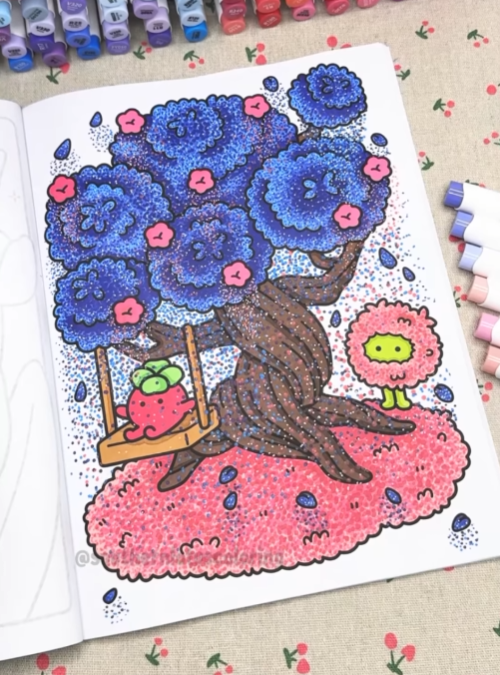
The combination of color gradients and glowing highlights brings it to life, creating a mesmerizing fairy-tale effect.
For more detailed tutorials, you can check out our Instagram.
Enter your email to get our special. Gift straight to your inbox.