

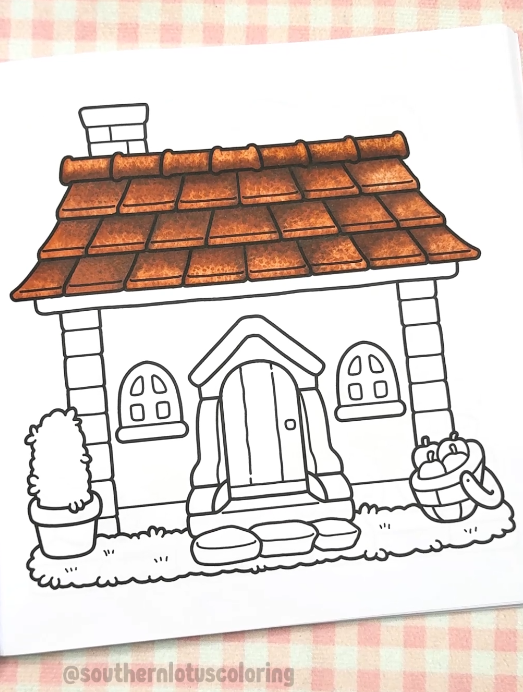
Creating realistic roof tiles in your coloring projects adds depth and authenticity to your artwork. In this tutorial, we'll use a page from the "Cottage Vibes" coloring book by Southern Lotus Coloring Book to demonstrate effective techniques for coloring roof tiles. By following these steps, you'll learn how to apply base colors, add shadows, and blend hues to achieve a natural look in your illustrations.
- "Cottage Vibes" Coloring Book by Southern Lotus Coloring Book
- Ohuhu Markers (E080, E130)
- Colorless blender
- Optional: White gel pen
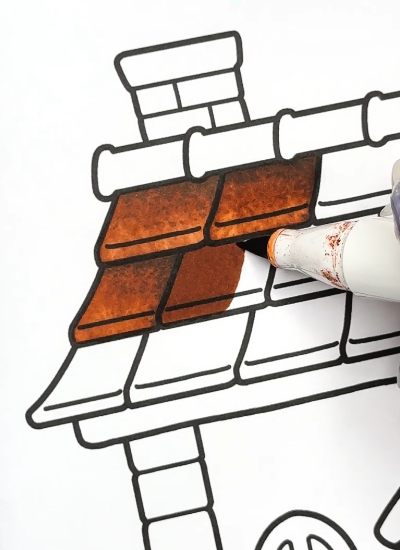
Begin by covering the entire surface of the roof tiles with the E080 marker. This base layer establishes the primary color of the tiles and sets the foundation for adding depth and shadows.
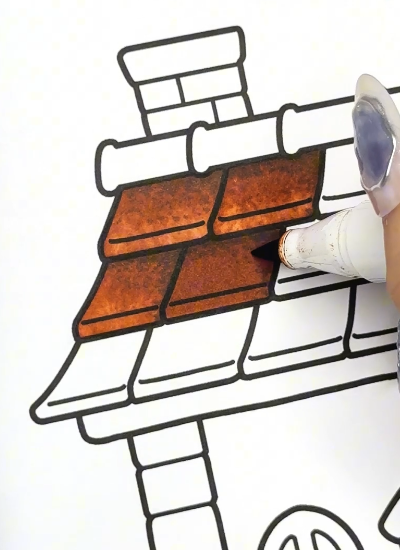
To create a three-dimensional effect, use the E130 marker to add shadows to the roof tiles. Focus on areas where tiles overlap or where natural shadows would occur, such as the lower edges or sides of each tile. This step enhances the realism of the roof by adding depth and contrast.
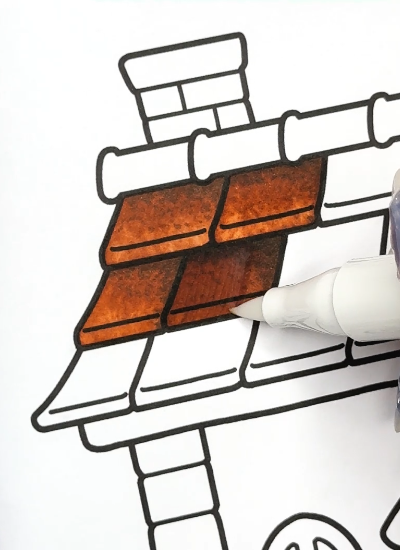
After applying the base color and shadows, use a colorless blender to smooth the transitions between the different shades. Gently apply the blender over the areas where the colors meet to achieve a seamless gradient, resulting in a more natural and cohesive appearance.
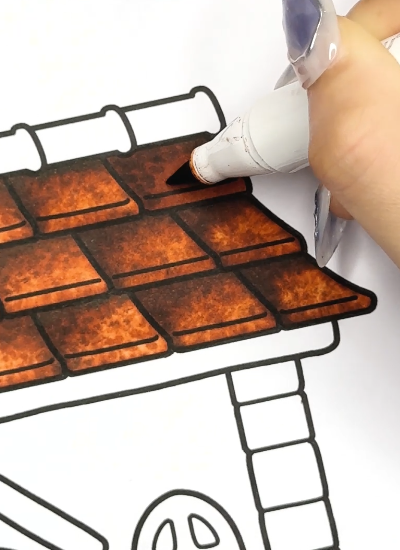
Continue applying the base color, adding shadows, and blending for all sections of the roof until the entire area is colored. This consistent approach ensures uniformity and enhances the overall aesthetic of your illustration.
For additional depth and realism, consider using a white gel pen to add subtle highlights to the roof tiles. Apply small strokes or dots to areas where light would naturally hit, such as the top edges of the tiles. This technique adds a touch of brightness and enhances the three-dimensional effect.
By following these steps, you've created realistic roof tiles that add character and depth to your illustration. The combination of base coloring, shadow application, and blending techniques brings the roof to life, enhancing the overall impact of your artwork.
If you enjoyed this tutorial and wish to further develop your coloring skills, consider exploring additional resources and guides on Instagram Southern Lotus.
Enter your email to get our special. Gift straight to your inbox.