
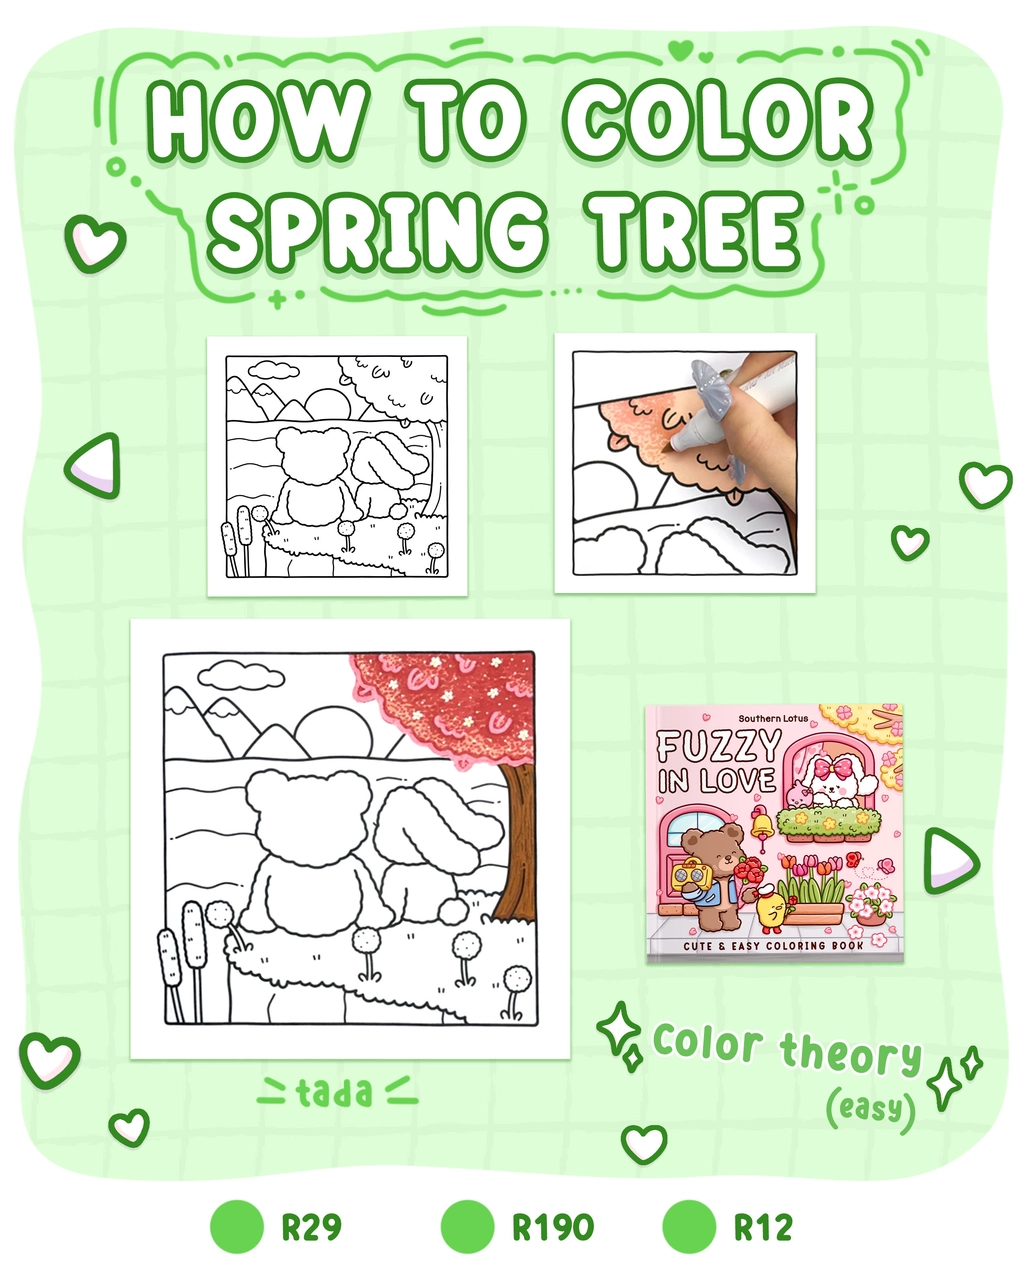
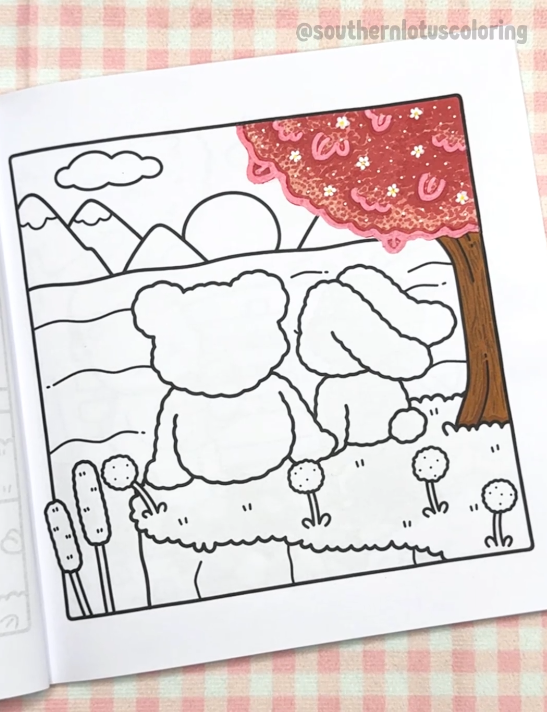
Bringing a spring tree to life in your coloring projects can add a vibrant and fresh touch to your artwork. In this Spring Tree Coloring Tutorial, we'll use a page from the "Fuzzy In Love" coloring book by Southern Lotus Coloring Book to create a dreamy spring tree. Follow these steps to achieve a realistic and enchanting spring tree illustration using the dot technique and blending techniques.
- Fuzzy In Love Coloring Book by Southern Lotus Coloring Book
- Ohuhu Markers (R29, R190, R12)
- White acrylic pen
- Red felt pen
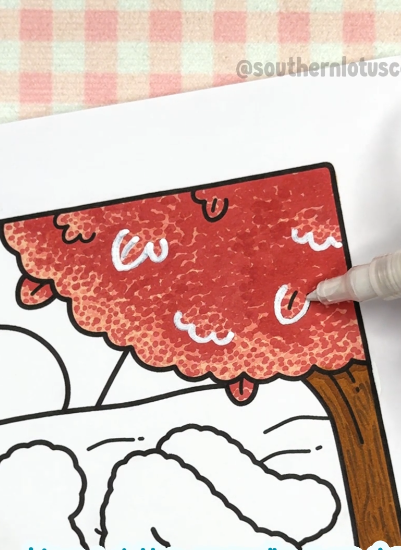
Begin by applying the lightest red shade (R29) to the entire tree canopy. This base layer sets the foundation for the subsequent layers and ensures a vibrant undertone for the foliage, helping to create a realistic spring tree canopy.
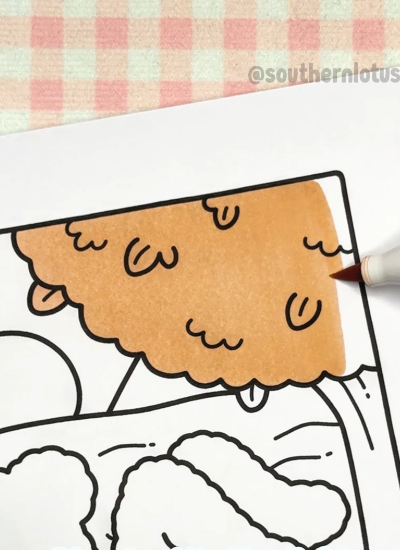
Using the middle shade (R190), apply the dot technique to the canopy. This involves placing small, random dots across the area to mimic the appearance of individual leaves. This method is perfect for achieving a textured and natural look in your spring tree art.
With the darkest shade (R12), continue the dot technique, focusing on areas where shadows naturally occur, such as the underside of branches or dense foliage sections. This step enhances the three-dimensional effect of the tree.
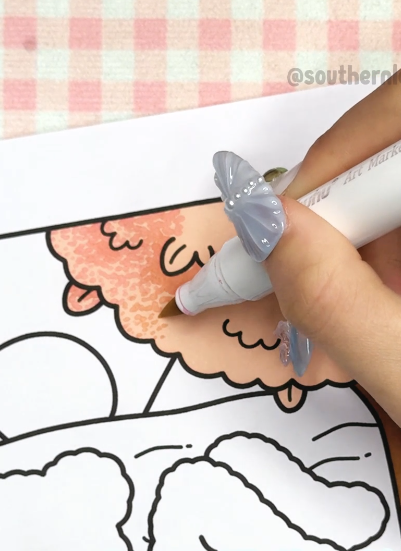
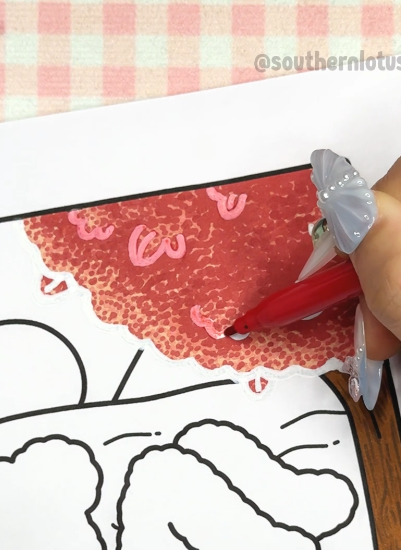
To achieve a soft and natural look, use a white acrylic pen to cover the existing black outlines of the tree. This technique allows the colors to blend seamlessly, giving the illustration a more organic appearance.
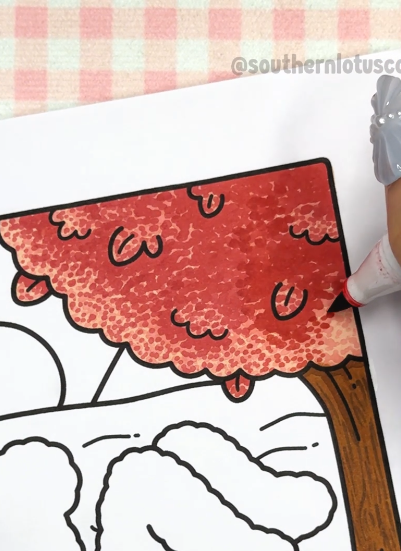
After concealing the black outlines, use a red felt pen to redraw the tree's outlines. This step ensures that the boundaries are clear yet harmonious with the overall color scheme, maintaining the integrity of the illustration.
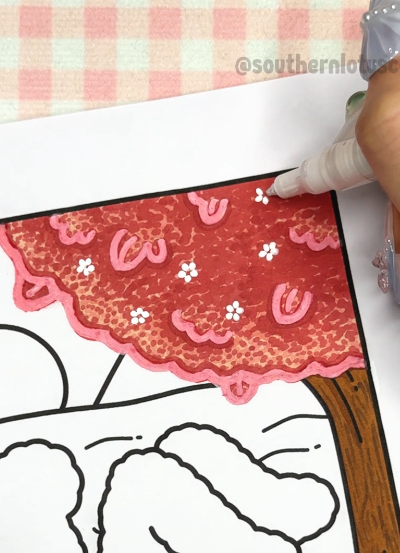
For a touch of springtime charm, add simple flowers to the tree canopy. Using the white acrylic pen, draw five small dots in a circular pattern to represent blossoms scattered throughout the foliage.
By following these spring tree coloring techniques, you've created a dreamy spring tree that captures the essence of the season. The combination of layering shades, utilizing the dot technique, and adding delicate flowers results in a vibrant and lifelike illustration.
If you enjoyed this Spring Tree Art Tutorial and want to discover more coloring techniques, follow Southern Lotus Coloring on Instagram for additional tips and inspiration.
Enter your email to get our special. Gift straight to your inbox.