

Coloring water can feel challenging at first, but when broken down into simple shapes and gentle layers, it becomes one of the most relaxing parts of any cute coloring page. Whether you're working on an aquarium, glass jar, landscape, or fantasy scene, these four beginner-friendly techniques will help you achieve dreamy, magical water.
Today, Southern Lotus will guide you through 4 adorable ways to color water using soft blends, bubbles, light shafts, and ripple effects. These techniques work beautifully for cute coloring pages, coloring pages for adults, stress relief coloring, water-themed illustrations, and any blank coloring practice sheet.
Ohuhu Markers
Method 1: Dreamy Water Coloring Tutorial
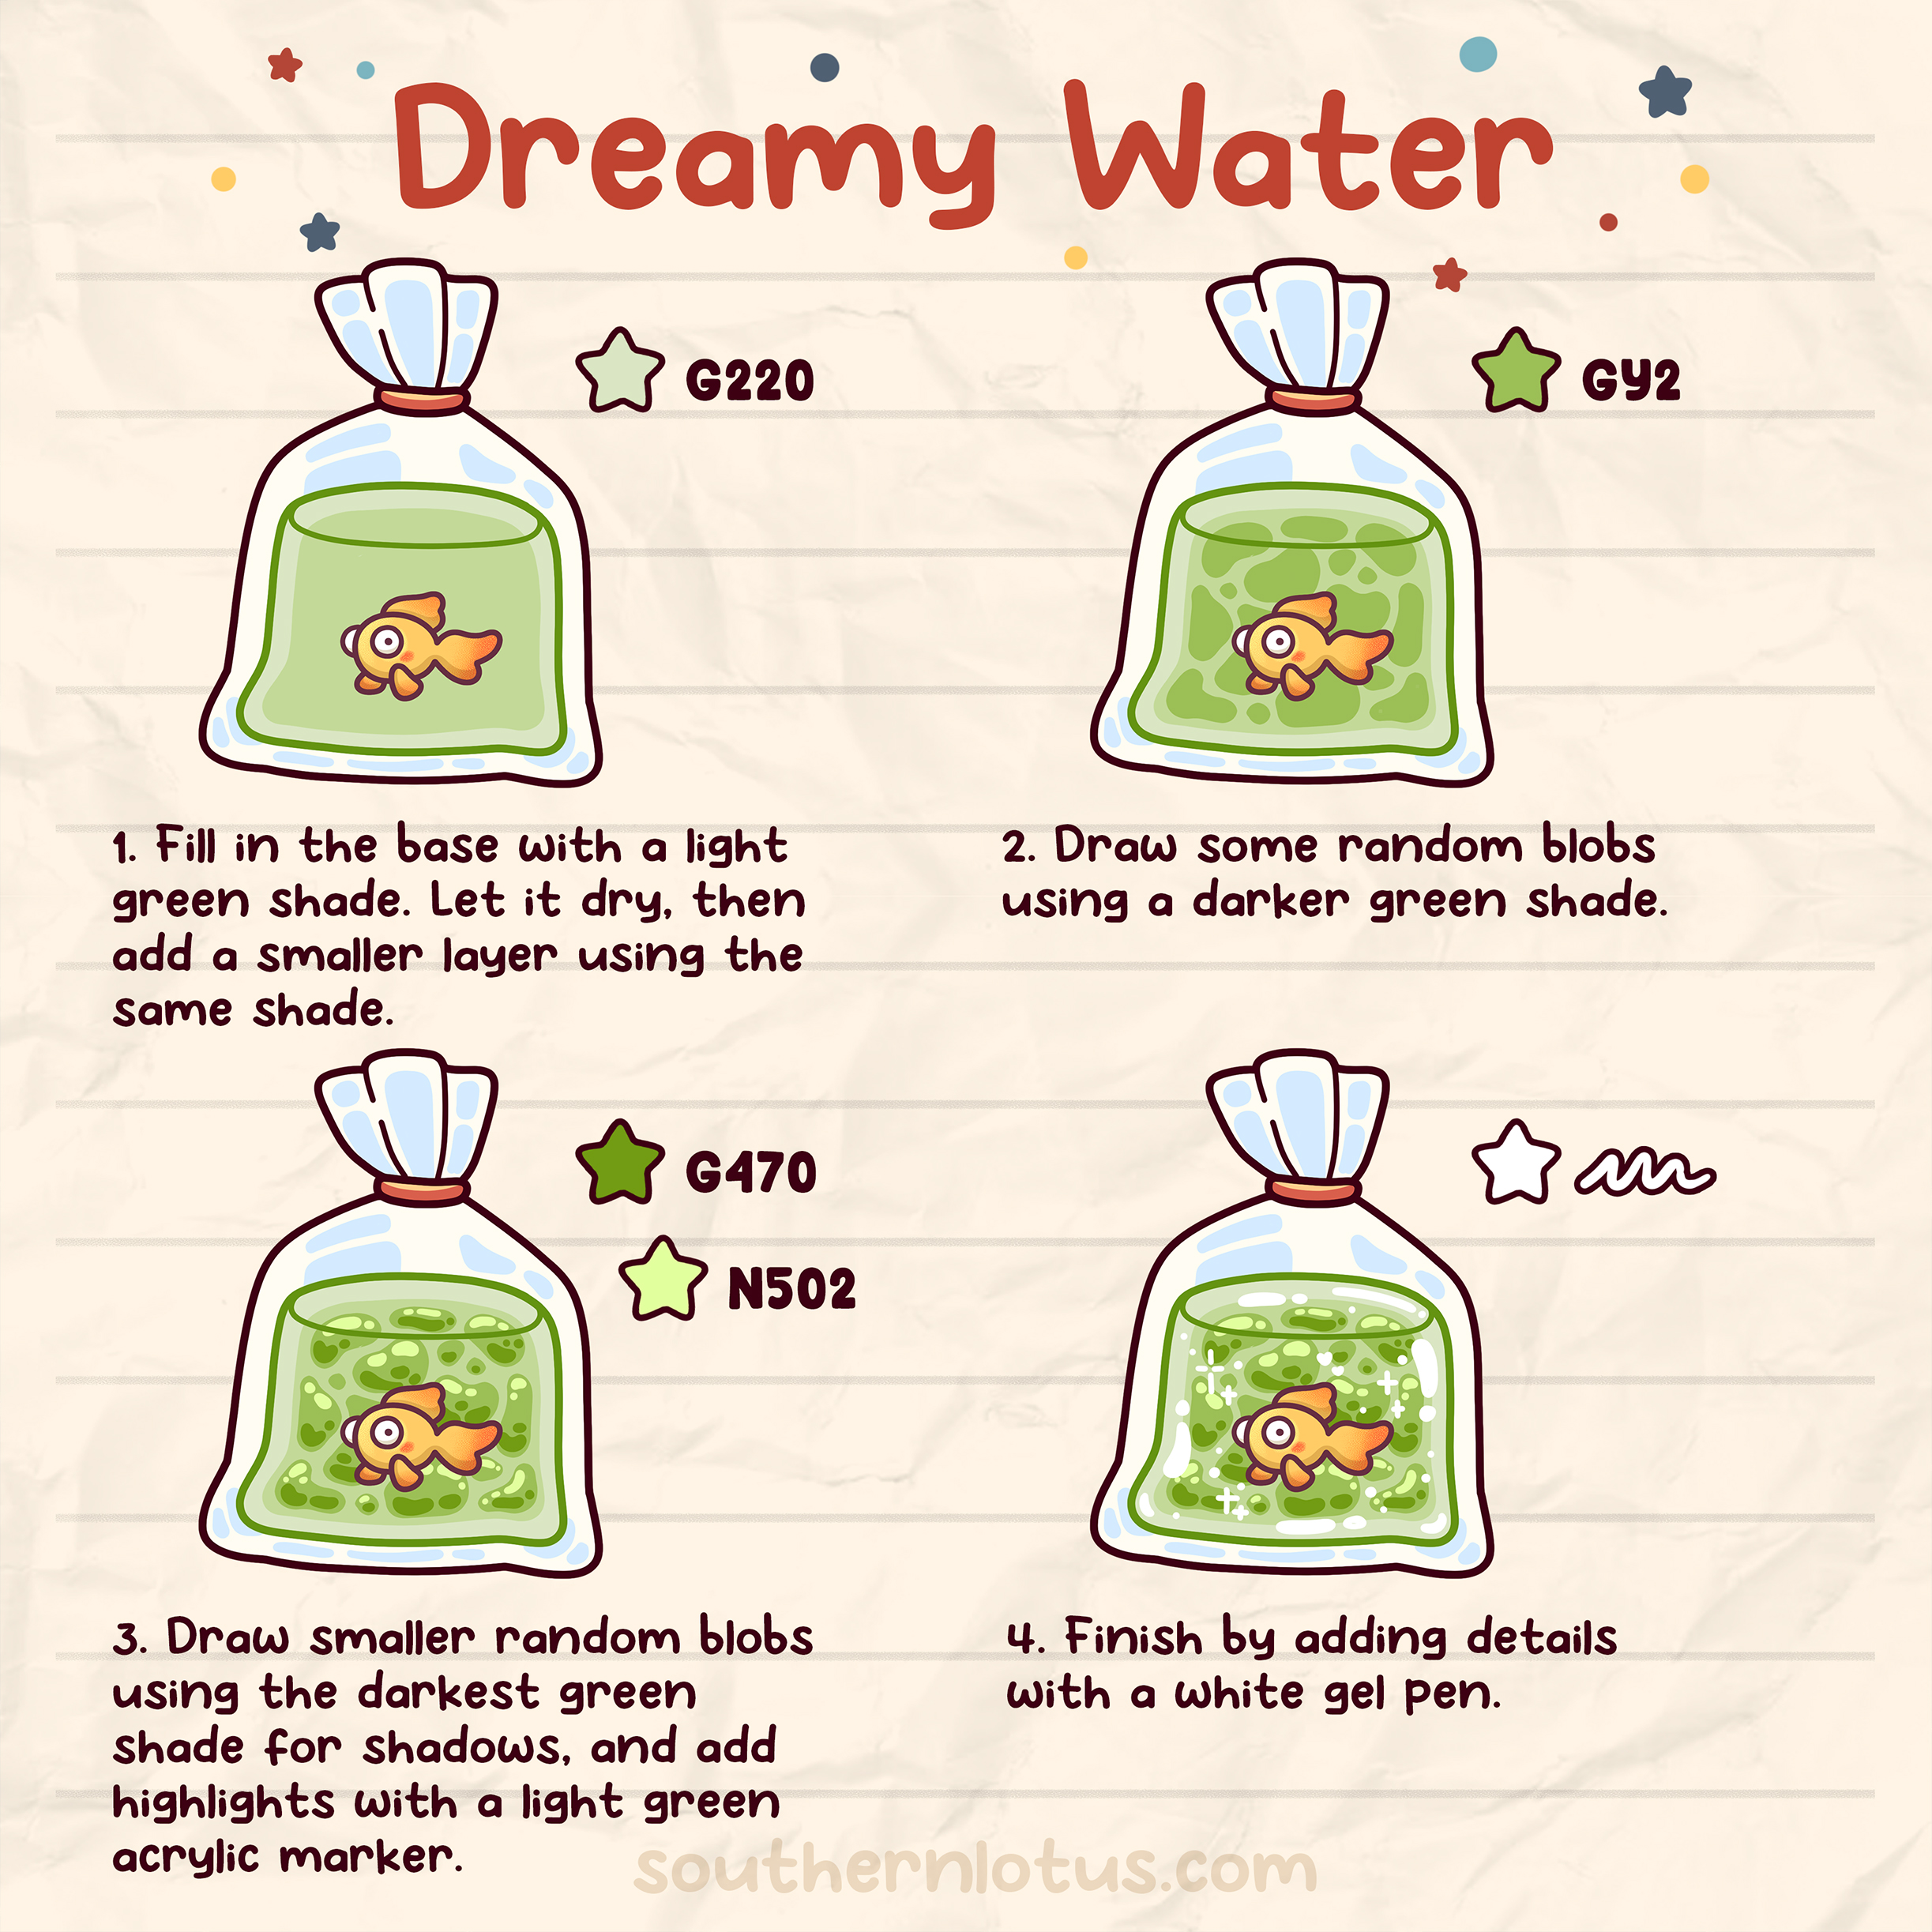
This dreamy green water style adds a soft, magical atmosphere to your coloring page. Start by laying a light green base using G220, then add darker green blobs using GY2. Keep the blobs irregular, uneven shapes feel more natural and cute.
Continue by darkening the shadow areas with G470 and N502 for added depth. Let the darker shades hug the edges of the glass or settle at the bottom, then finish with white gel pen bubbles and cute sparkles. This method is perfect for jars, potion bottles, fantasy liquids, and nature-themed coloring pages.
Method 2: Red Tide Coloring Tutorial
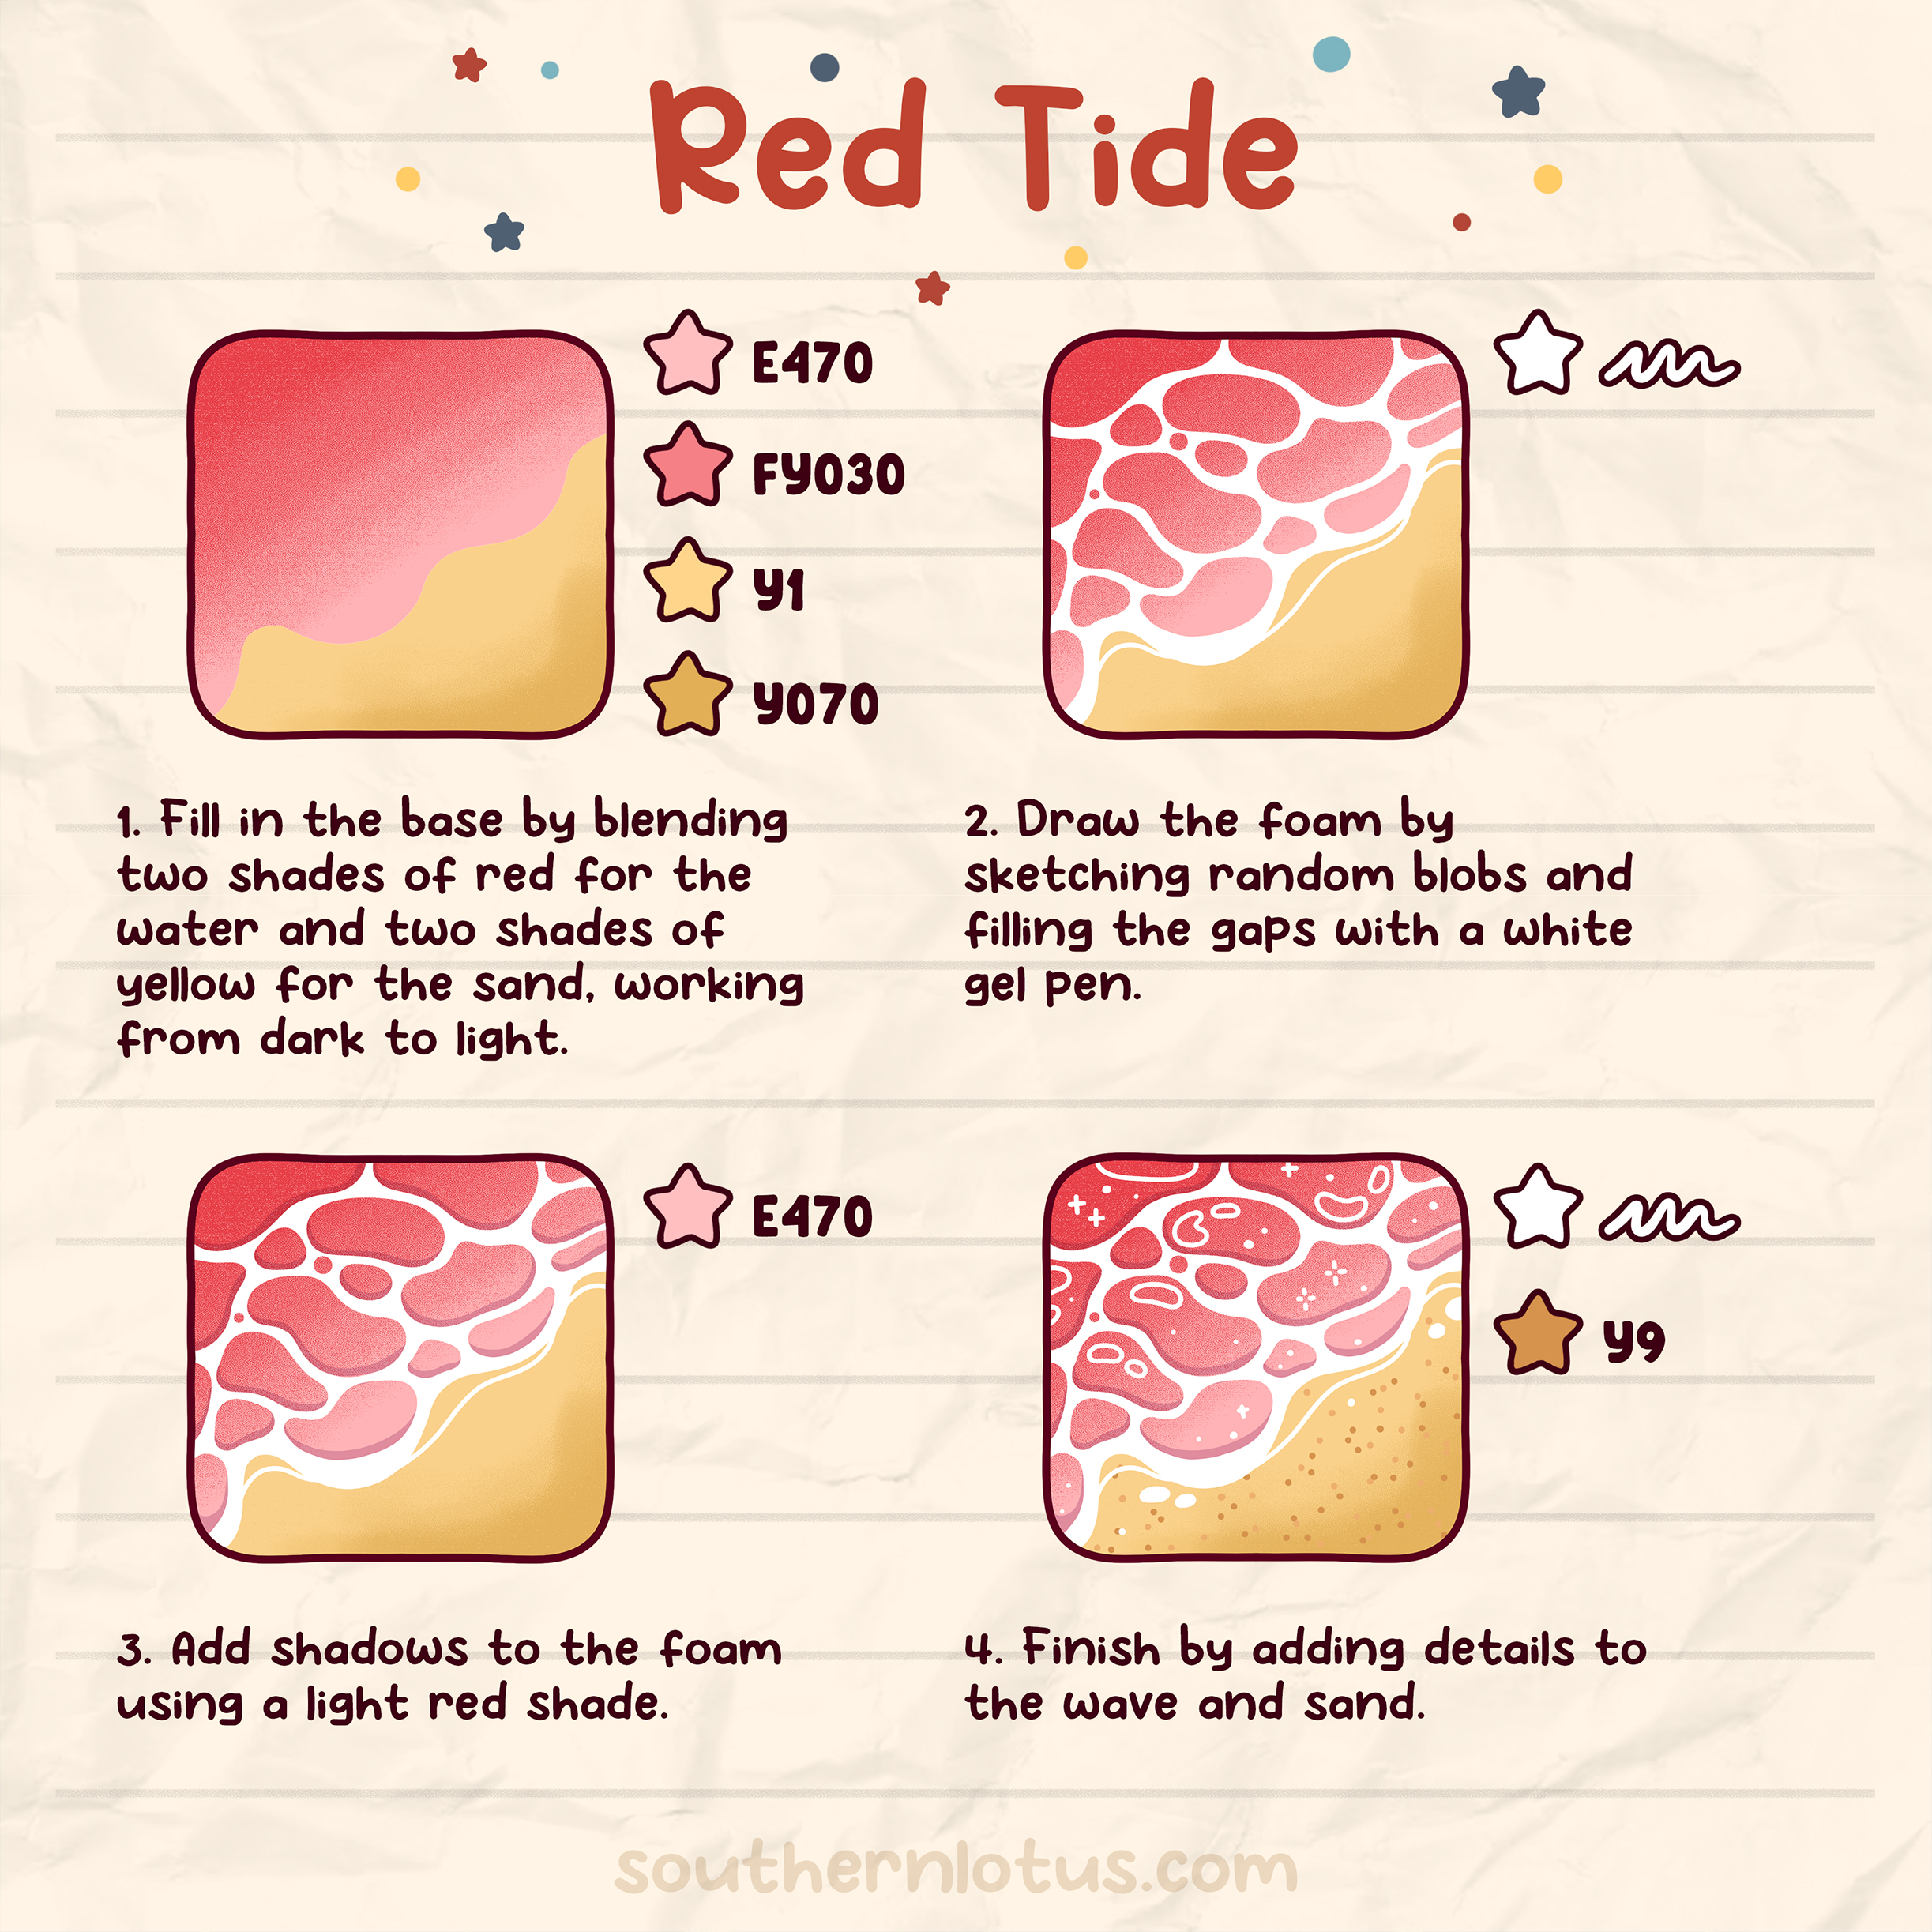
This method is inspired by warm sunset shores. Blend red and pink tones like E470 and FY030 from top to bottom to build a soft gradient. Add a gentle strip of light yellow at the sand area using Y1 so the base feels warm and glowing.
Once the base is dry, sketch the white sea foam with a gel pen. Add smaller gaps and details using Y070 and deepen the most intense spots with Y9 or slightly stronger reds. This technique brings a warm, cozy vibe to your water coloring page, great for beach jars, fantasy potions, and magical summer themes.
Method 3: Water Ripples Coloring Tutorial
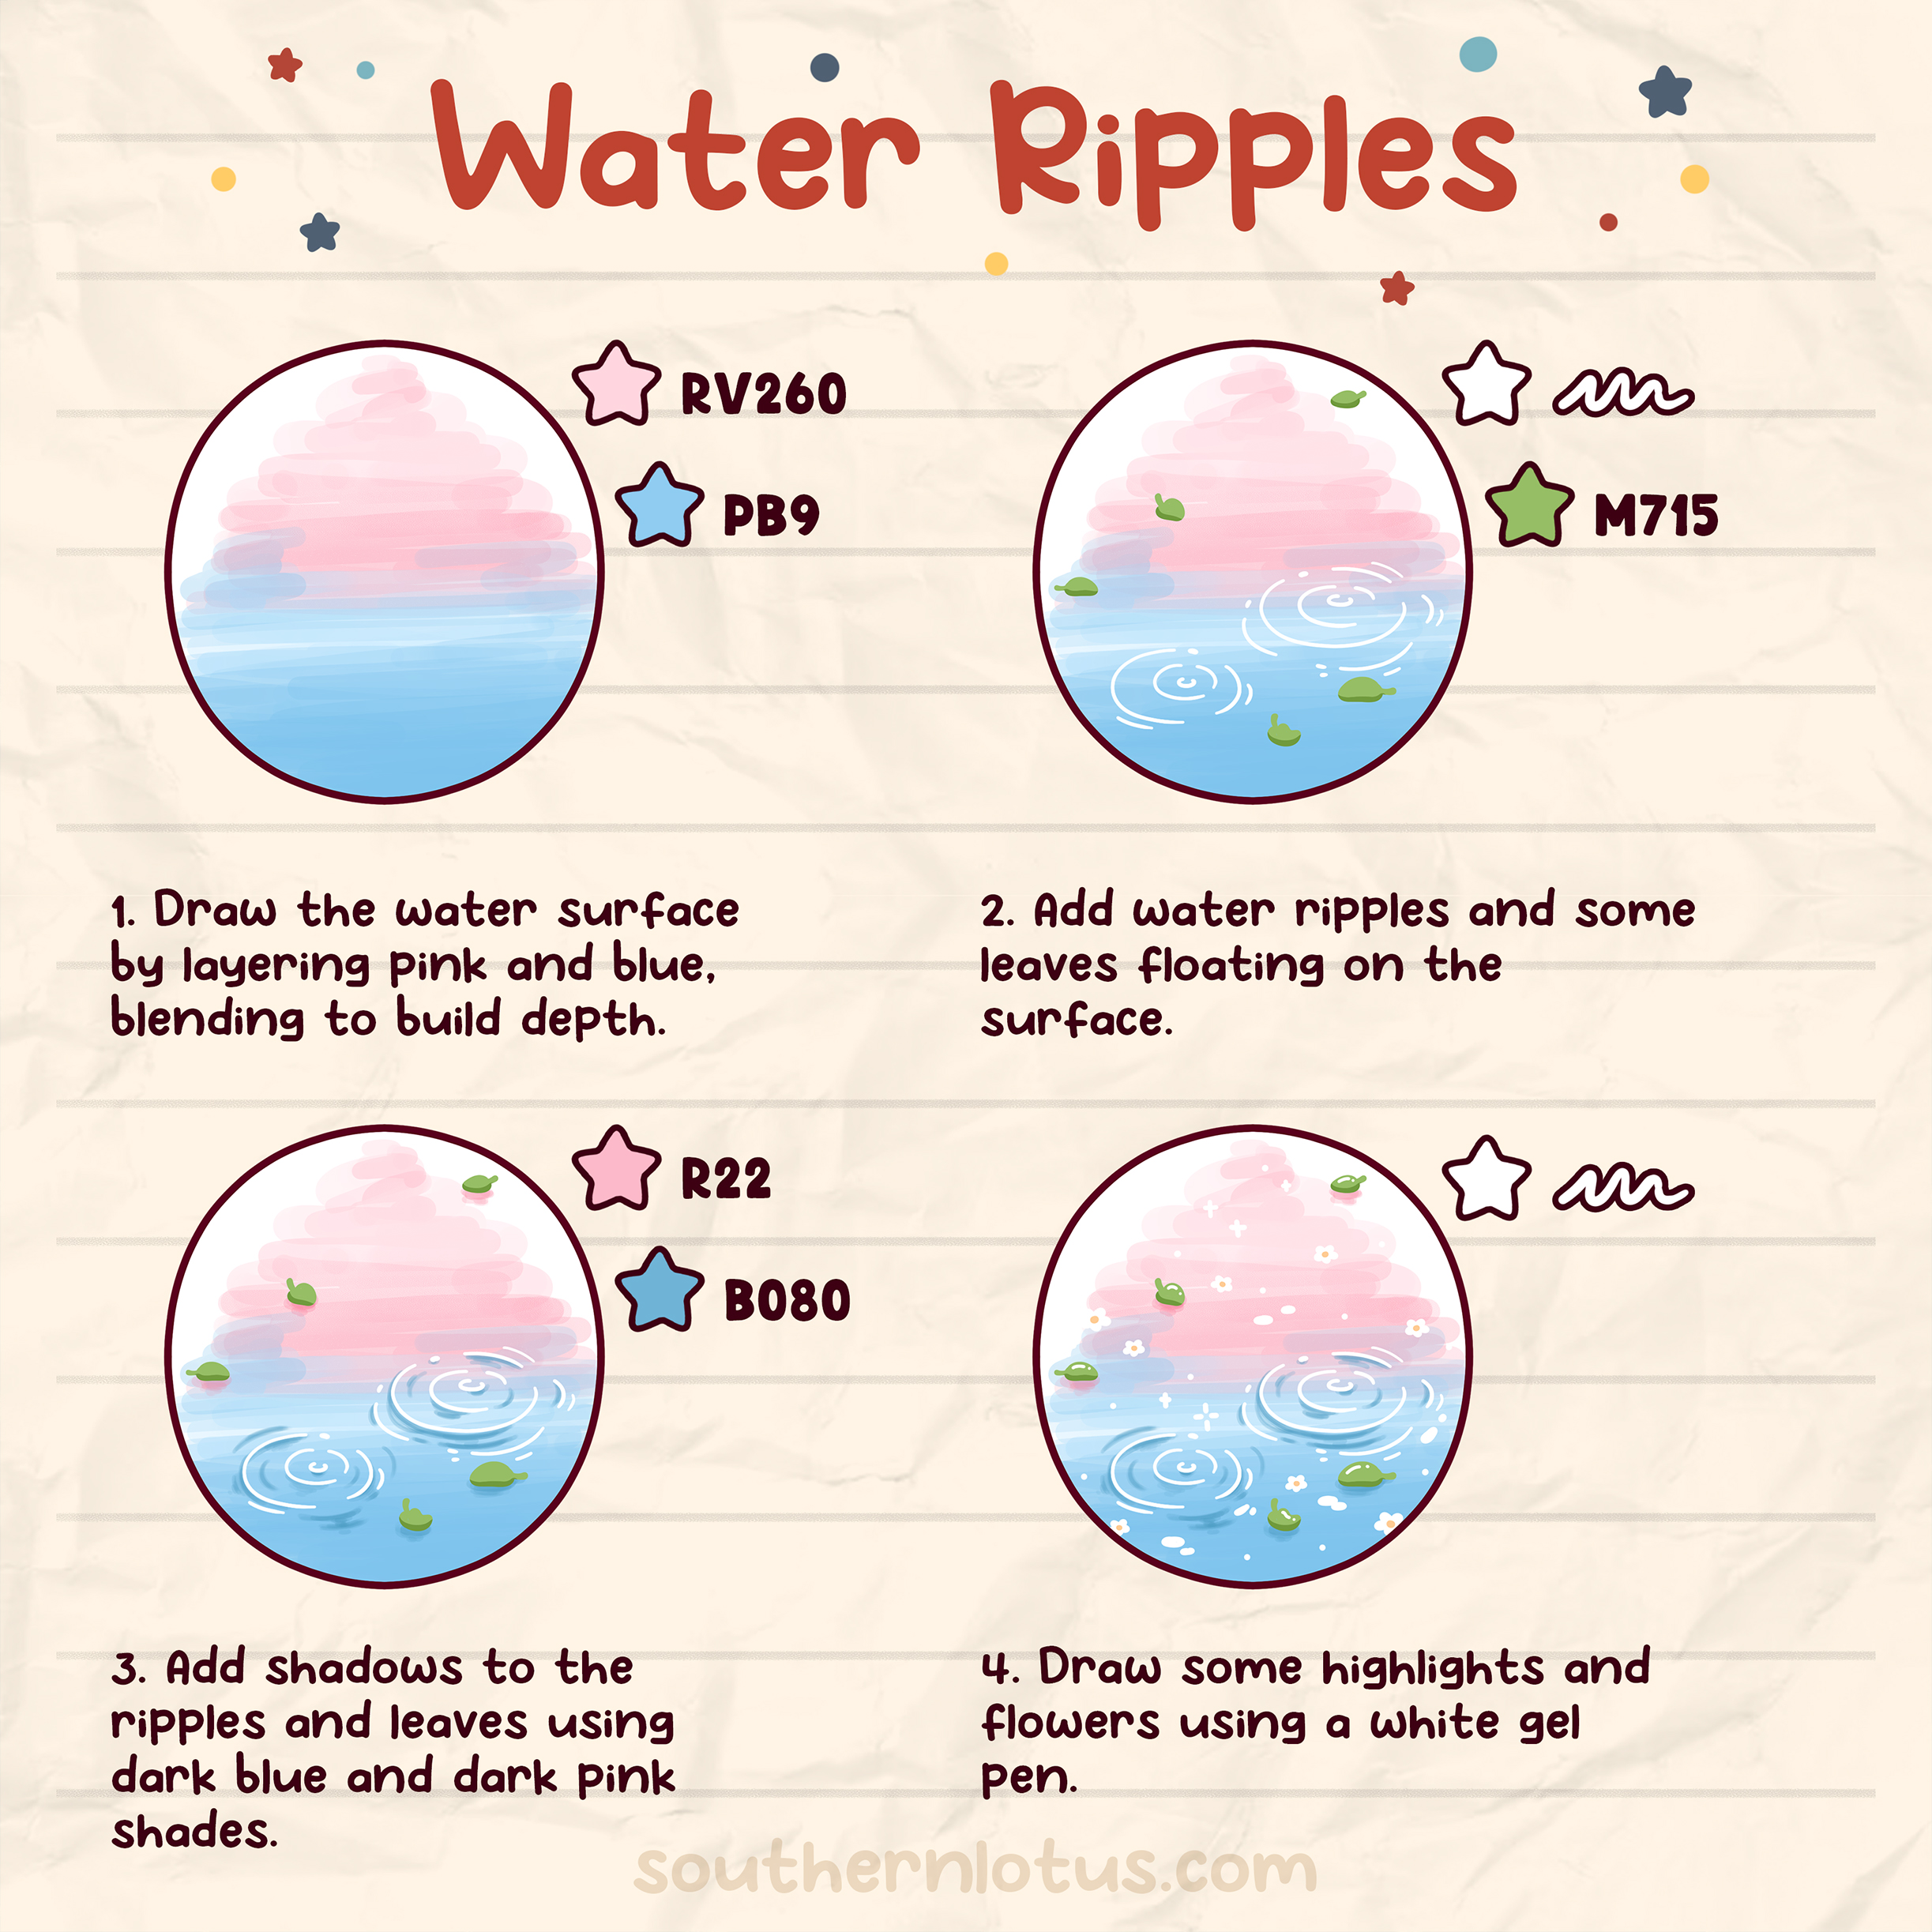
Start with a gentle pink-to-blue gradient using RV260 at the top and PB9 at the bottom. This soft pastel blend instantly gives your cute coloring page a dreamy atmosphere.
Next, draw ripples and floating leaves using a white gel pen. Add shadows to the ripples using R22 and B080, then deepen a few areas with M715 to suggest slightly darker water under the rings. This effect works beautifully for ponds, fish bowls, glass jars, and any water scene that needs serenity and charm.
Method 4: Underwater Light Shafts Coloring Tutorial
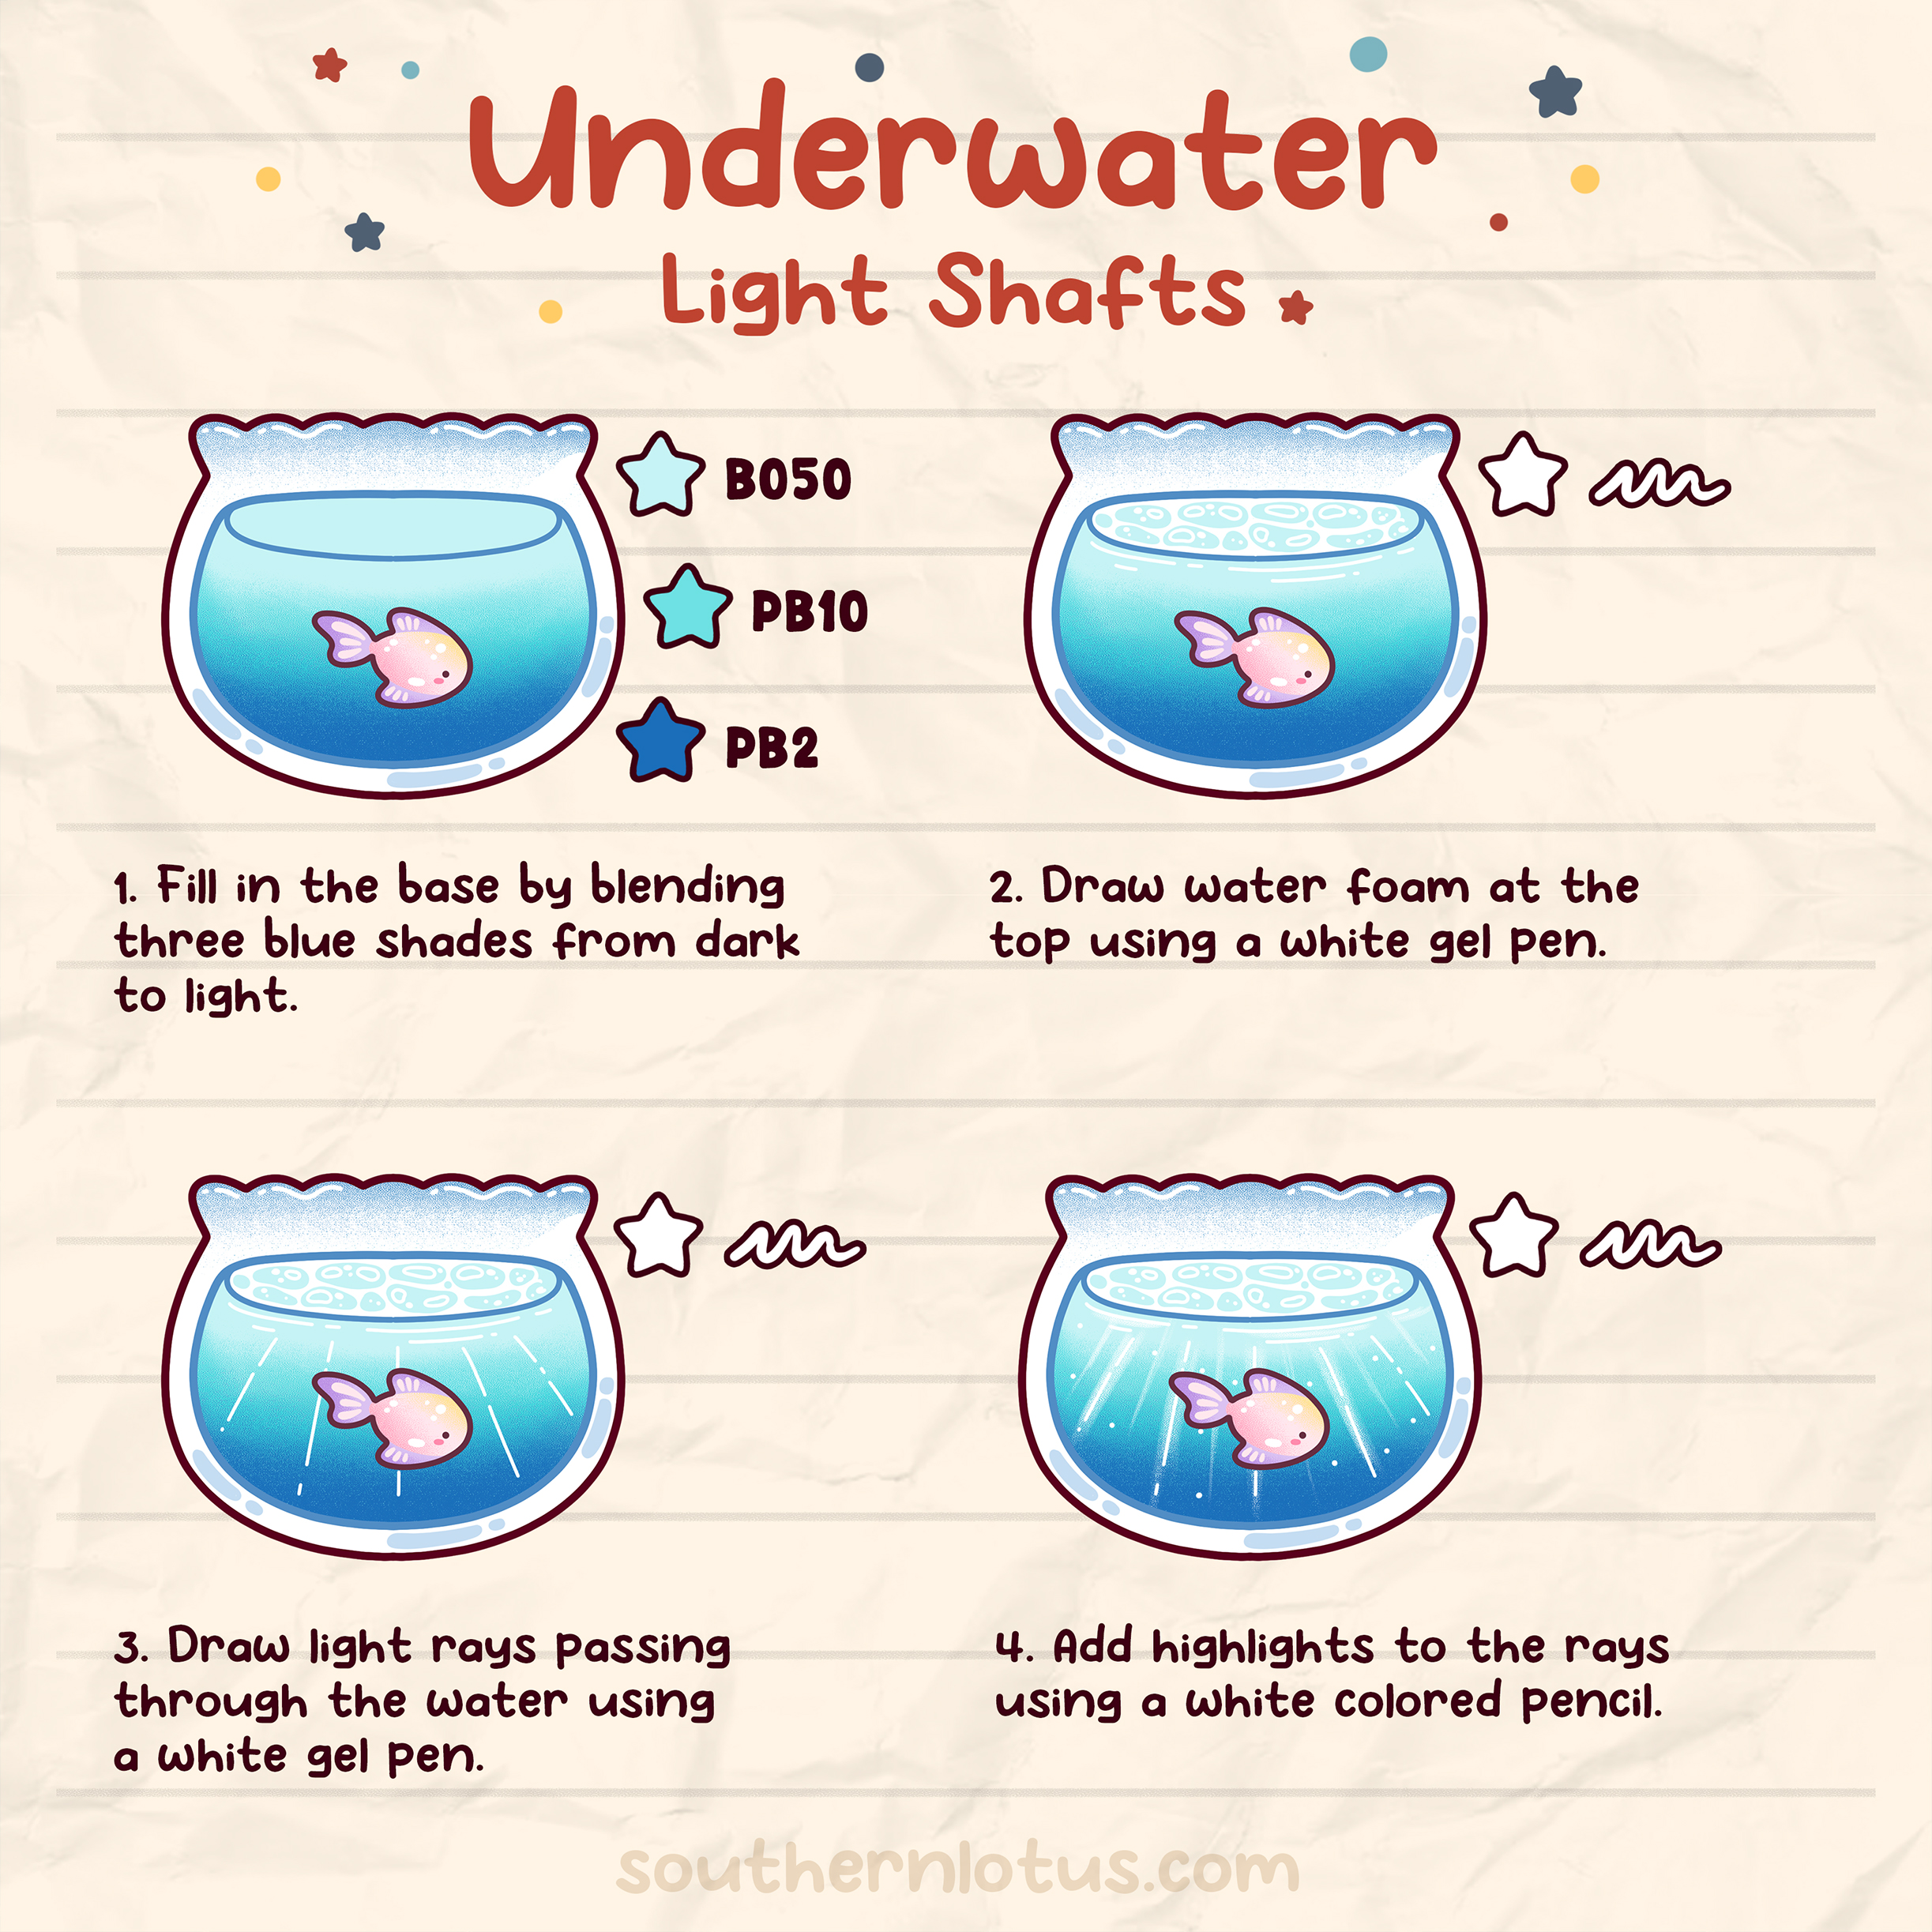
Start with a cool blue gradient using B050 and PB10. Blend from dark at the top to light at the bottom. This creates the illusion of depth in the water and makes it feel like you are looking into a real aquarium.
Use PB2 to reinforce the deepest shadows near the edges of the bowl or at the very top where the water is farthest from the light. Then, using a white gel pen, add a soft layer of foam at the water’s surface and draw thin beams of light coming through the surface. This instantly transforms your water into an underwater scene full of movement and softness.
Finish with sparkles, bubbles, and highlights on the fish or objects inside the water. This method is especially stunning for aquariums, underwater jars, and ocean-themed coloring pages.
Want to practice all four water styles? We’ve prepared a free printable sheet featuring each water type. You can print it out or color digitally, perfect for beginners exploring cute water effects.
Enter your email to get our special. Gift straight to your inbox.