
There's a hidden world within a strand of hair it's the curves that catch the light, the shadows that speak of depth, and the hues that tell a story of confidence and creativity.
Learning how to color girl hair isn't just a technique it's an art form that teaches patience, rhythm, and the ability to express personality.
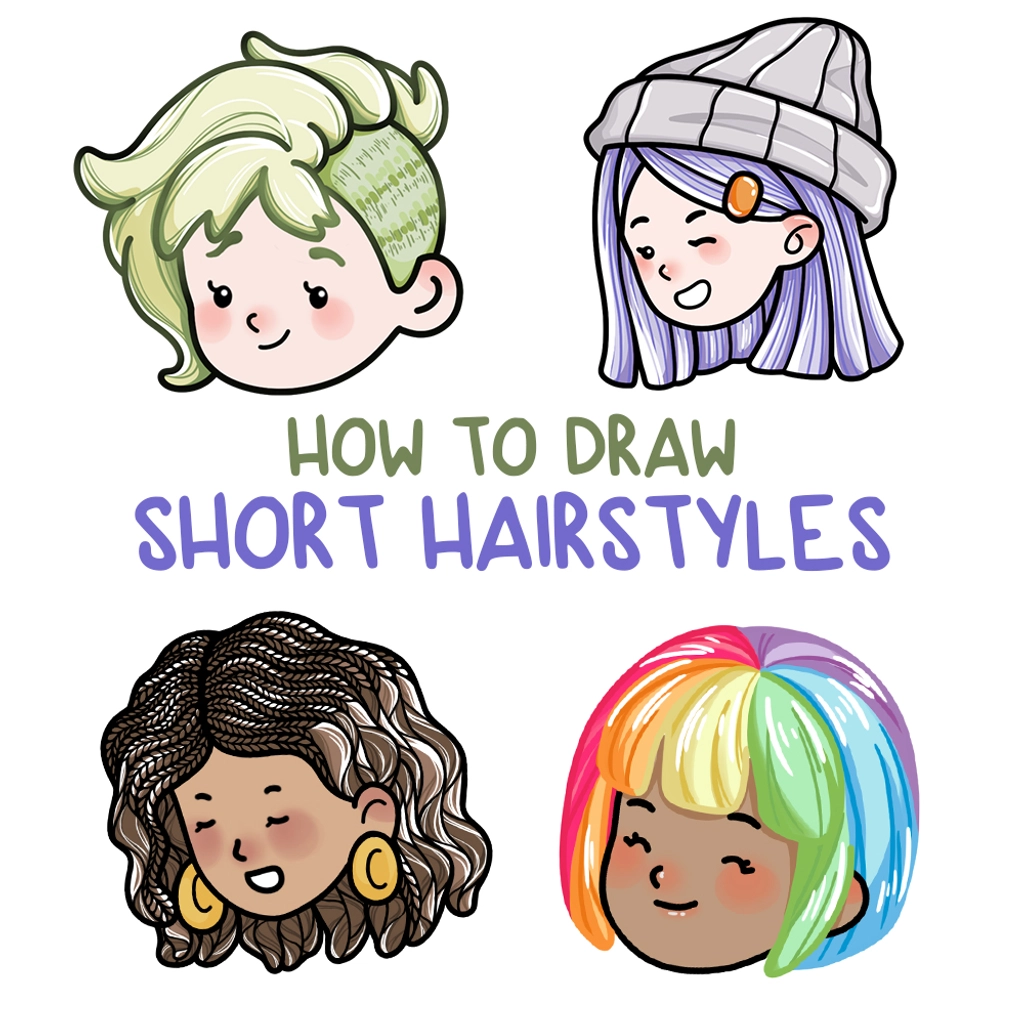
In this guide, we'll explore four stunning hairstyles: the Knotless Braid, the Straight Bob, the Shaved Side, and the Rainbow Bob. You'll discover how to blend tones, control highlights, and use your tools like an artist shaping light.
We're ready to share all the best coloring techniques so that every one of your pictures shines. Get ready to transform your coloring pages into masterpieces!
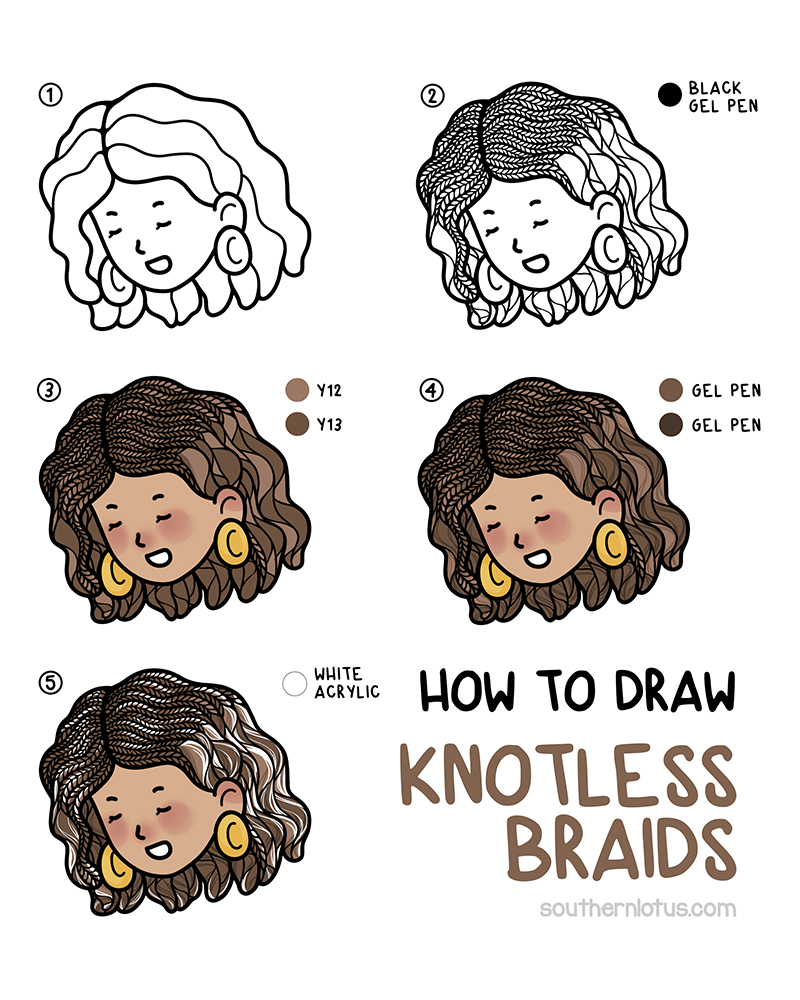
The Knotless Braid offers a dynamic and strong look, where each interlocking line exudes power and elegance. Every strand overlaps with a quiet intention, creating a harmonious balance between precision and softness.
Step 1: Defining the Texture
Start by using a black gel pen to draw small, diagonal lines that establish the core rhythm of each braid. These short, curved strokes will bring life to each section, following their natural "S" movement. Don't fill every space maintain gaps between the lines to keep the texture soft.
Step 2: Building the Base Tone (Y12, Y13)
Apply a smooth, even layer of Y12 over the entire braided section and the loose curly strands. This will be the lightest area of the hair.
Then, sweep Y13 across the middle and lower curves to create a rounded form. Keep the markers moving along the contour of the braid.
Step 3: Creating Primary Volume
Use a brown gel pen to draw small, short lines that mimic the twists of the braid, creating light shadows underneath the braided sections and the curls.
Allow the strokes to run narrowly under the interlocked lines instead of coloring the entire shape. To make the braid look volumetric, only apply the darkest shadow to the underside of each section.
Step 4: Highlighting the Braid
Use white ink or White Acrylic to draw small, sharp white light lines, focusing on the top and upper surface of the braided sections. This helps the hair look sleek and 3D.
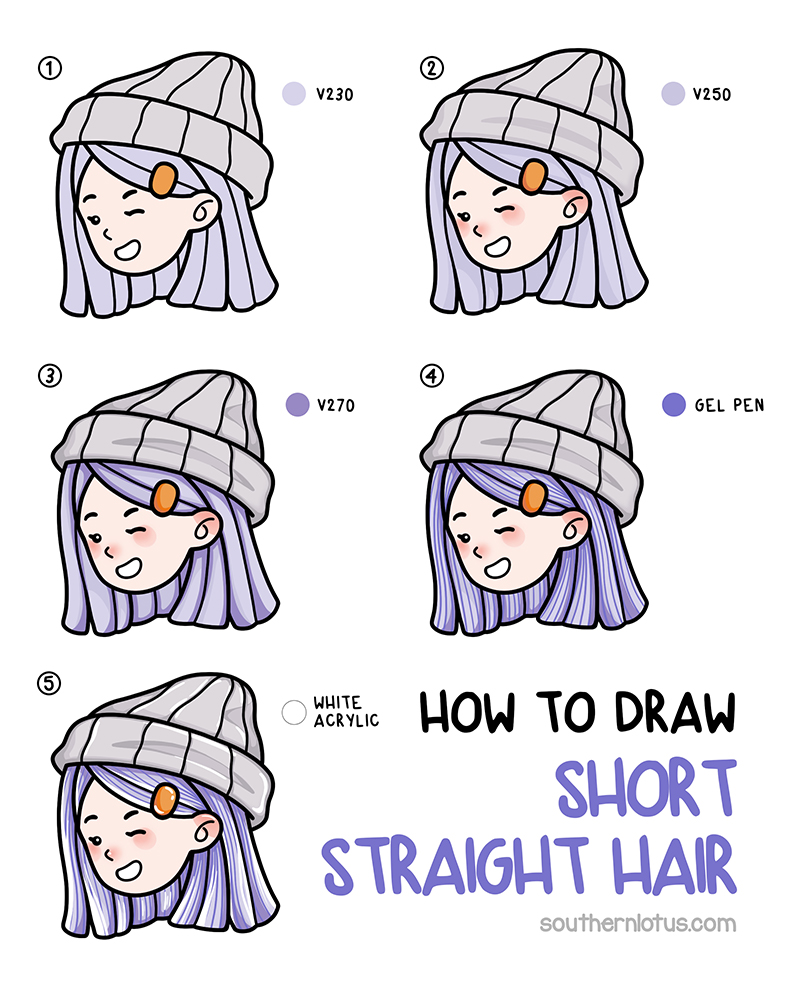
The Straight Bob has a warm and cute appeal. With this hairstyle, the art is defined by smooth blending and neat highlights.
Step 1: Lavender Base and Shadowing (V230, V250)
This step establishes structure and lets the viewer know where the light is coming from. Apply a smooth base layer with V230, using long, careful strokes that follow the direction of the hair.
With V250, create a gentle shadow from the hairline, under the ears, and beneath the chin. Lightly flick the strokes upward to blend naturally with the base tone.
Step 2: Deepening the Shadows (V270)
This is when the illusion of volume begins to emerge. Use V270 to add depth to the deepest, most hidden areas of the hair, such as the folds underneath the top layer or at the nape of the neck.
Step 3: Fine Hair Strand Technique (Purple Gel Pen)
Use a fine tipped purple gel pen and draw a few delicate, thin strands along the highlight strip. Vary the pressure to make the lines look lively and natural.
Draw only a small amount, focusing on the boundaries between the light and dark areas. Avoid drawing too many lines to keep the hair from looking dry.
Step 4: Creating Smoothness and Highlights (White Acrylic)
Finally, use white acrylic to paint one or two thin strokes over the highlight band and add a small dot of sparkle near the edge.
This gently reflects light, completing the silky and glossy effect.
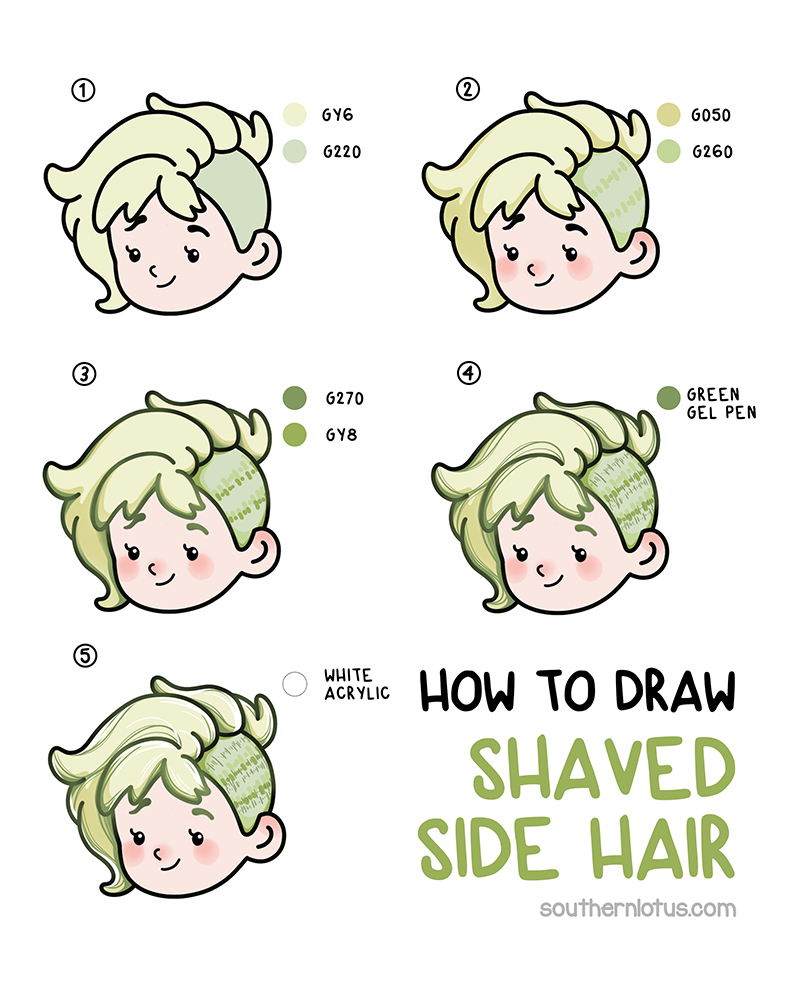
The Shaved Side hairstyle embodies bold confidence. It portrays a girl who is unapologetic and full of personality. Coloring this style means mastering two hair textures while maintaining tonal unity.
Step 1: Blue Green Base Color (GY6, G220)
Use GY6 for the long hair section, applying it broadly, and G220 to cover the shaved section.
Both colors should be blended evenly following the hair's growth direction smooth for the long hair, and rounded and soft for the short hair.
Step 2: Blocking the Long Hair (G050, G260)
Use darker moss green tones to add depth to the long, wavy hair. Keep G050 for the brighter planes and G260 for the inner folds and root areas.
Step 3: Volumizing and Shaping the Hair (G270, GY8)
With G270 and GY8, reinforce the roots and the subtle hairline where the long hair meets the shaved part. Lightly flicking the overlapping hair with G270 will create instant volume.
Step 4: Shaved Hair Details (Green Gel Pen)
Use a dark green gel pen or a fine liner to draw a series of very short, parallel, upward moving lines, simulating new hair growth. These strokes must be close to the scalp and create a fading effect toward the forehead do not color too evenly.
Step 5: Finishing Light (White Acrylic)
Use white acrylic to create gentle highlights along the upper part of the long hair and a thin edge where it meets the shaved side, adding volume and highlighting the contrast between the two sides.
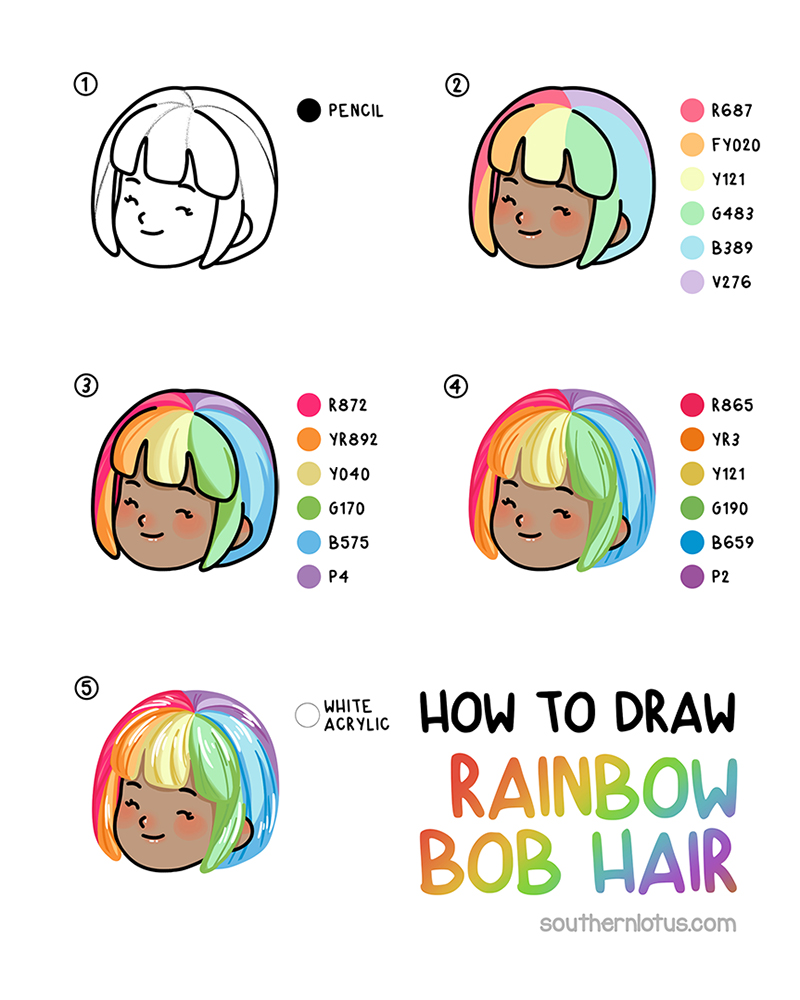
The Rainbow Bob is a statement of creativity and boldness, perfect for coloring pages for adults who love to stand out. Each color holds its place in a delicate gradient, blending seamlessly into the next.
Step 1: Sketching
Use a light pencil to sketch the path of the colors on the bob. Divide the strands into curved sections, following the natural movement from the crown to the tips.
Step 2: Color Blocking and Light Base Layer
Begin by applying the first layers of light colors: R687, FY020, Y121, G483, B389, and V276. Move from warm to cool, allowing each color to slightly overlap at the meeting points. Ensure each color block has a clean boundary that doesn't bleed.
Step 3: Shading with Tonal Colors
Select a color one shade darker than the base tone. Add R872, YR892, Y040, G170, B575, and P4 to enhance saturation and smooth the transition effects.
Step 4: Grounding with Depth
Use the darkest colors R865, YR3, Y121, G190, B659, and P2 to emphasize the deepest areas, such as under the bangs, along the face contour, and close to the roots.
Step 5: Creating Glass Like Shine (White Acrylic)
Use white acrylic to draw thin, vertical highlight lines along the curve of the crown, adding a few small dots on the brightest bands. These strokes simulate reflected light and unify the entire gradient effect under a soft glow.
Do you love this cute hair coloring page style? These beautiful hair samples are part of our Girl Spaces Vol. 2 Coloring Book. The book is filled with fantastic girl coloring pages featuring unique characters and backgrounds.
You can download 10 free printable coloring pages to experience the artistry firsthand.
Furthermore, we've prepared a PDF file of these hair samples so you can download and immediately try out the techniques you've just learned.
Enter your email to get our special. Gift straight to your inbox.