

Walls don't have to be blank, they can be the secret detail that breathes life into your artwork. In this guide, Southern Lotus will walk you through 4 ways to color walls: Brick, Glossy Tiles, Christmas Pattern, and Stone & Moss.
Whether it's the cozy brick wall behind a warm café scene, a sleek, glossy tiled bathroom, a cute festive Christmas backdrop, or a moss covered garden wall, these textures will add depth, atmosphere, and a story to your coloring pages.
Grab your brushes and let's bring some magical finishing touches to your paintings!
Brick is more than just a building material; it's a symbol of solidity, history, and a rustic, warm aesthetic. It's an indispensable part of classic coloring pages.
When recreated in art, the brick texture gives a sense of reality, steadfastness, and nostalgia, perfect for drawings of classic architecture, bustling streets, or a cozy home corner.
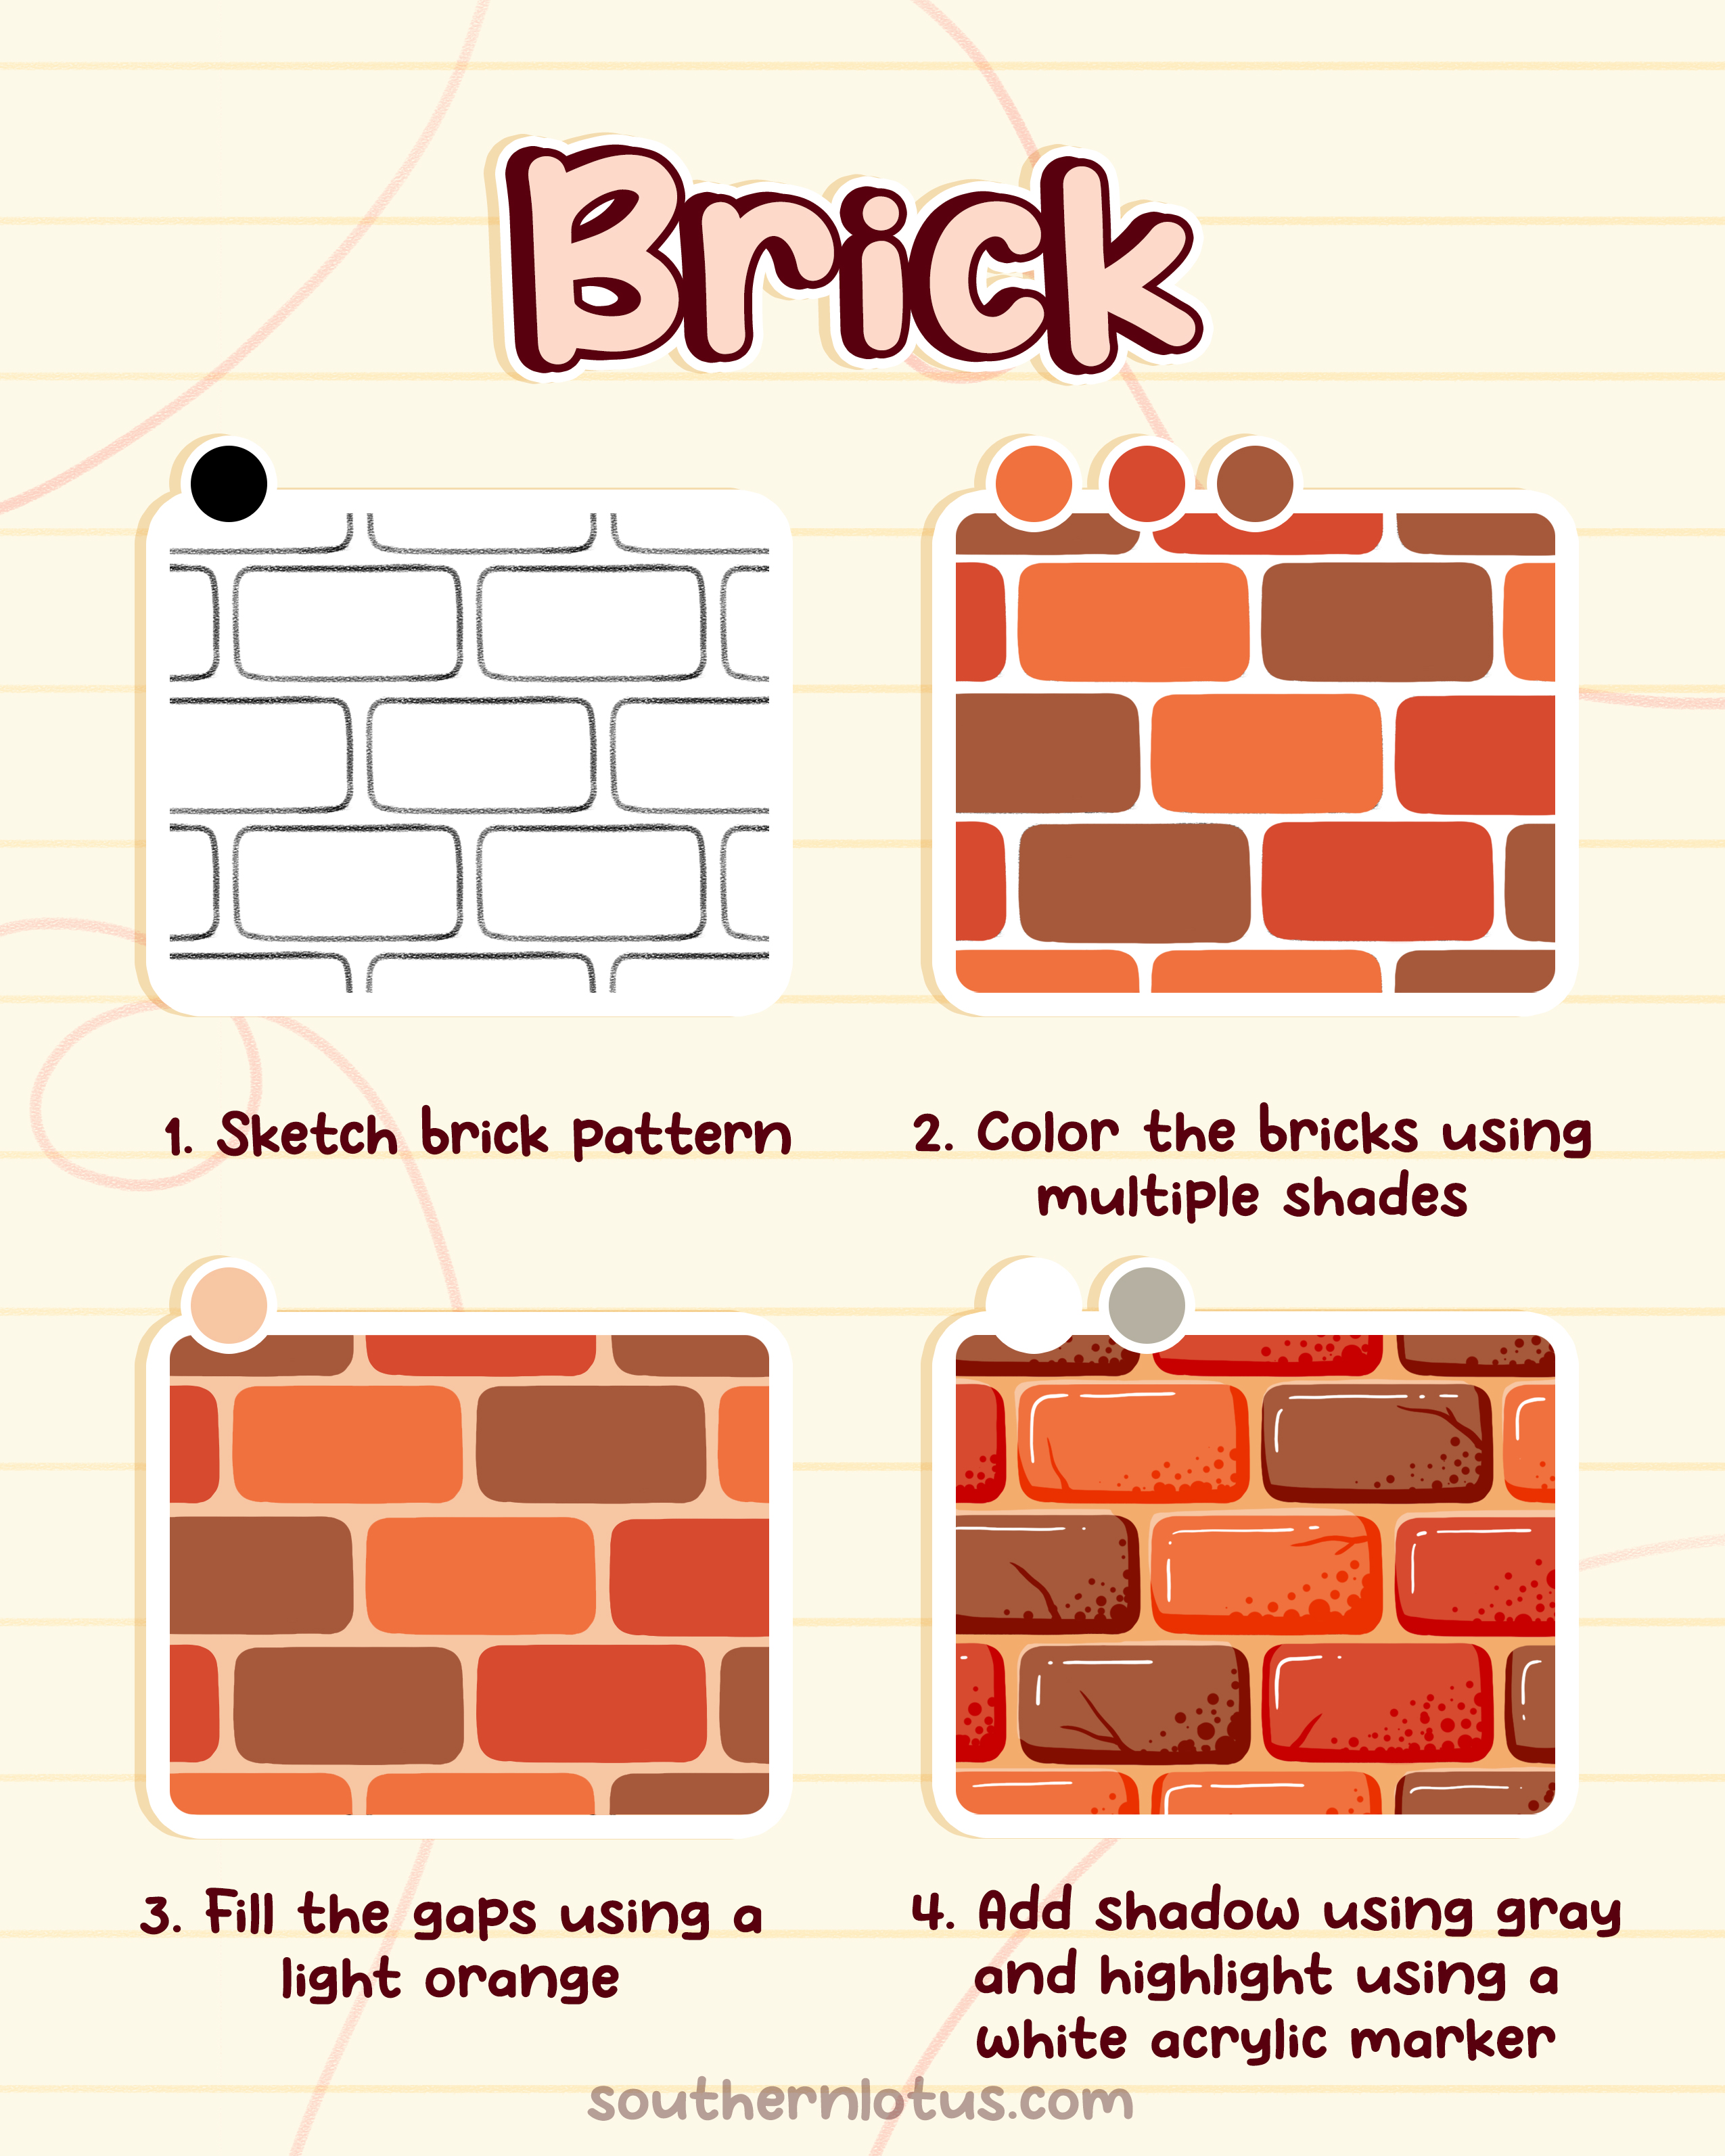
Step 1: Start by carefully sketching the basic brick pattern. Pay attention to the staggered arrangement of the bricks. Keep the rows slightly irregular for a more authentic, handcrafted feel.
Step 2: Instead of using a single color, use various shades of burnt orange, reddish brown, and earthy brown. Color each brick alternately. Some bricks can be darker, some lighter, creating the rich, authentic look of real bricks weathered by time.
Step 3: Use a very light orange or pale beige to carefully color the mortar lines between the bricks. This light color will help clearly define each brick and create a gentle contrast, highlighting the texture.
Step 4: To give the brick depth and vibrancy, add shadows using a light gray or dark brown along the bottom or right edges of each brick, where the light is less likely to reach. Then, use a white acrylic pen to add small highlights on the top corners or left edges of each brick, simulating reflected light.
Glossy ceramic tiles bring a modern, vibrant, and characteristic flair. With their geometric shapes and light reflecting surface, this wall style is perfect for spaces that need freshness, energy, and a touch of luxury.
You can use this style in trendy cafés, stylish bathrooms, or Pop Art inspired illustrations.
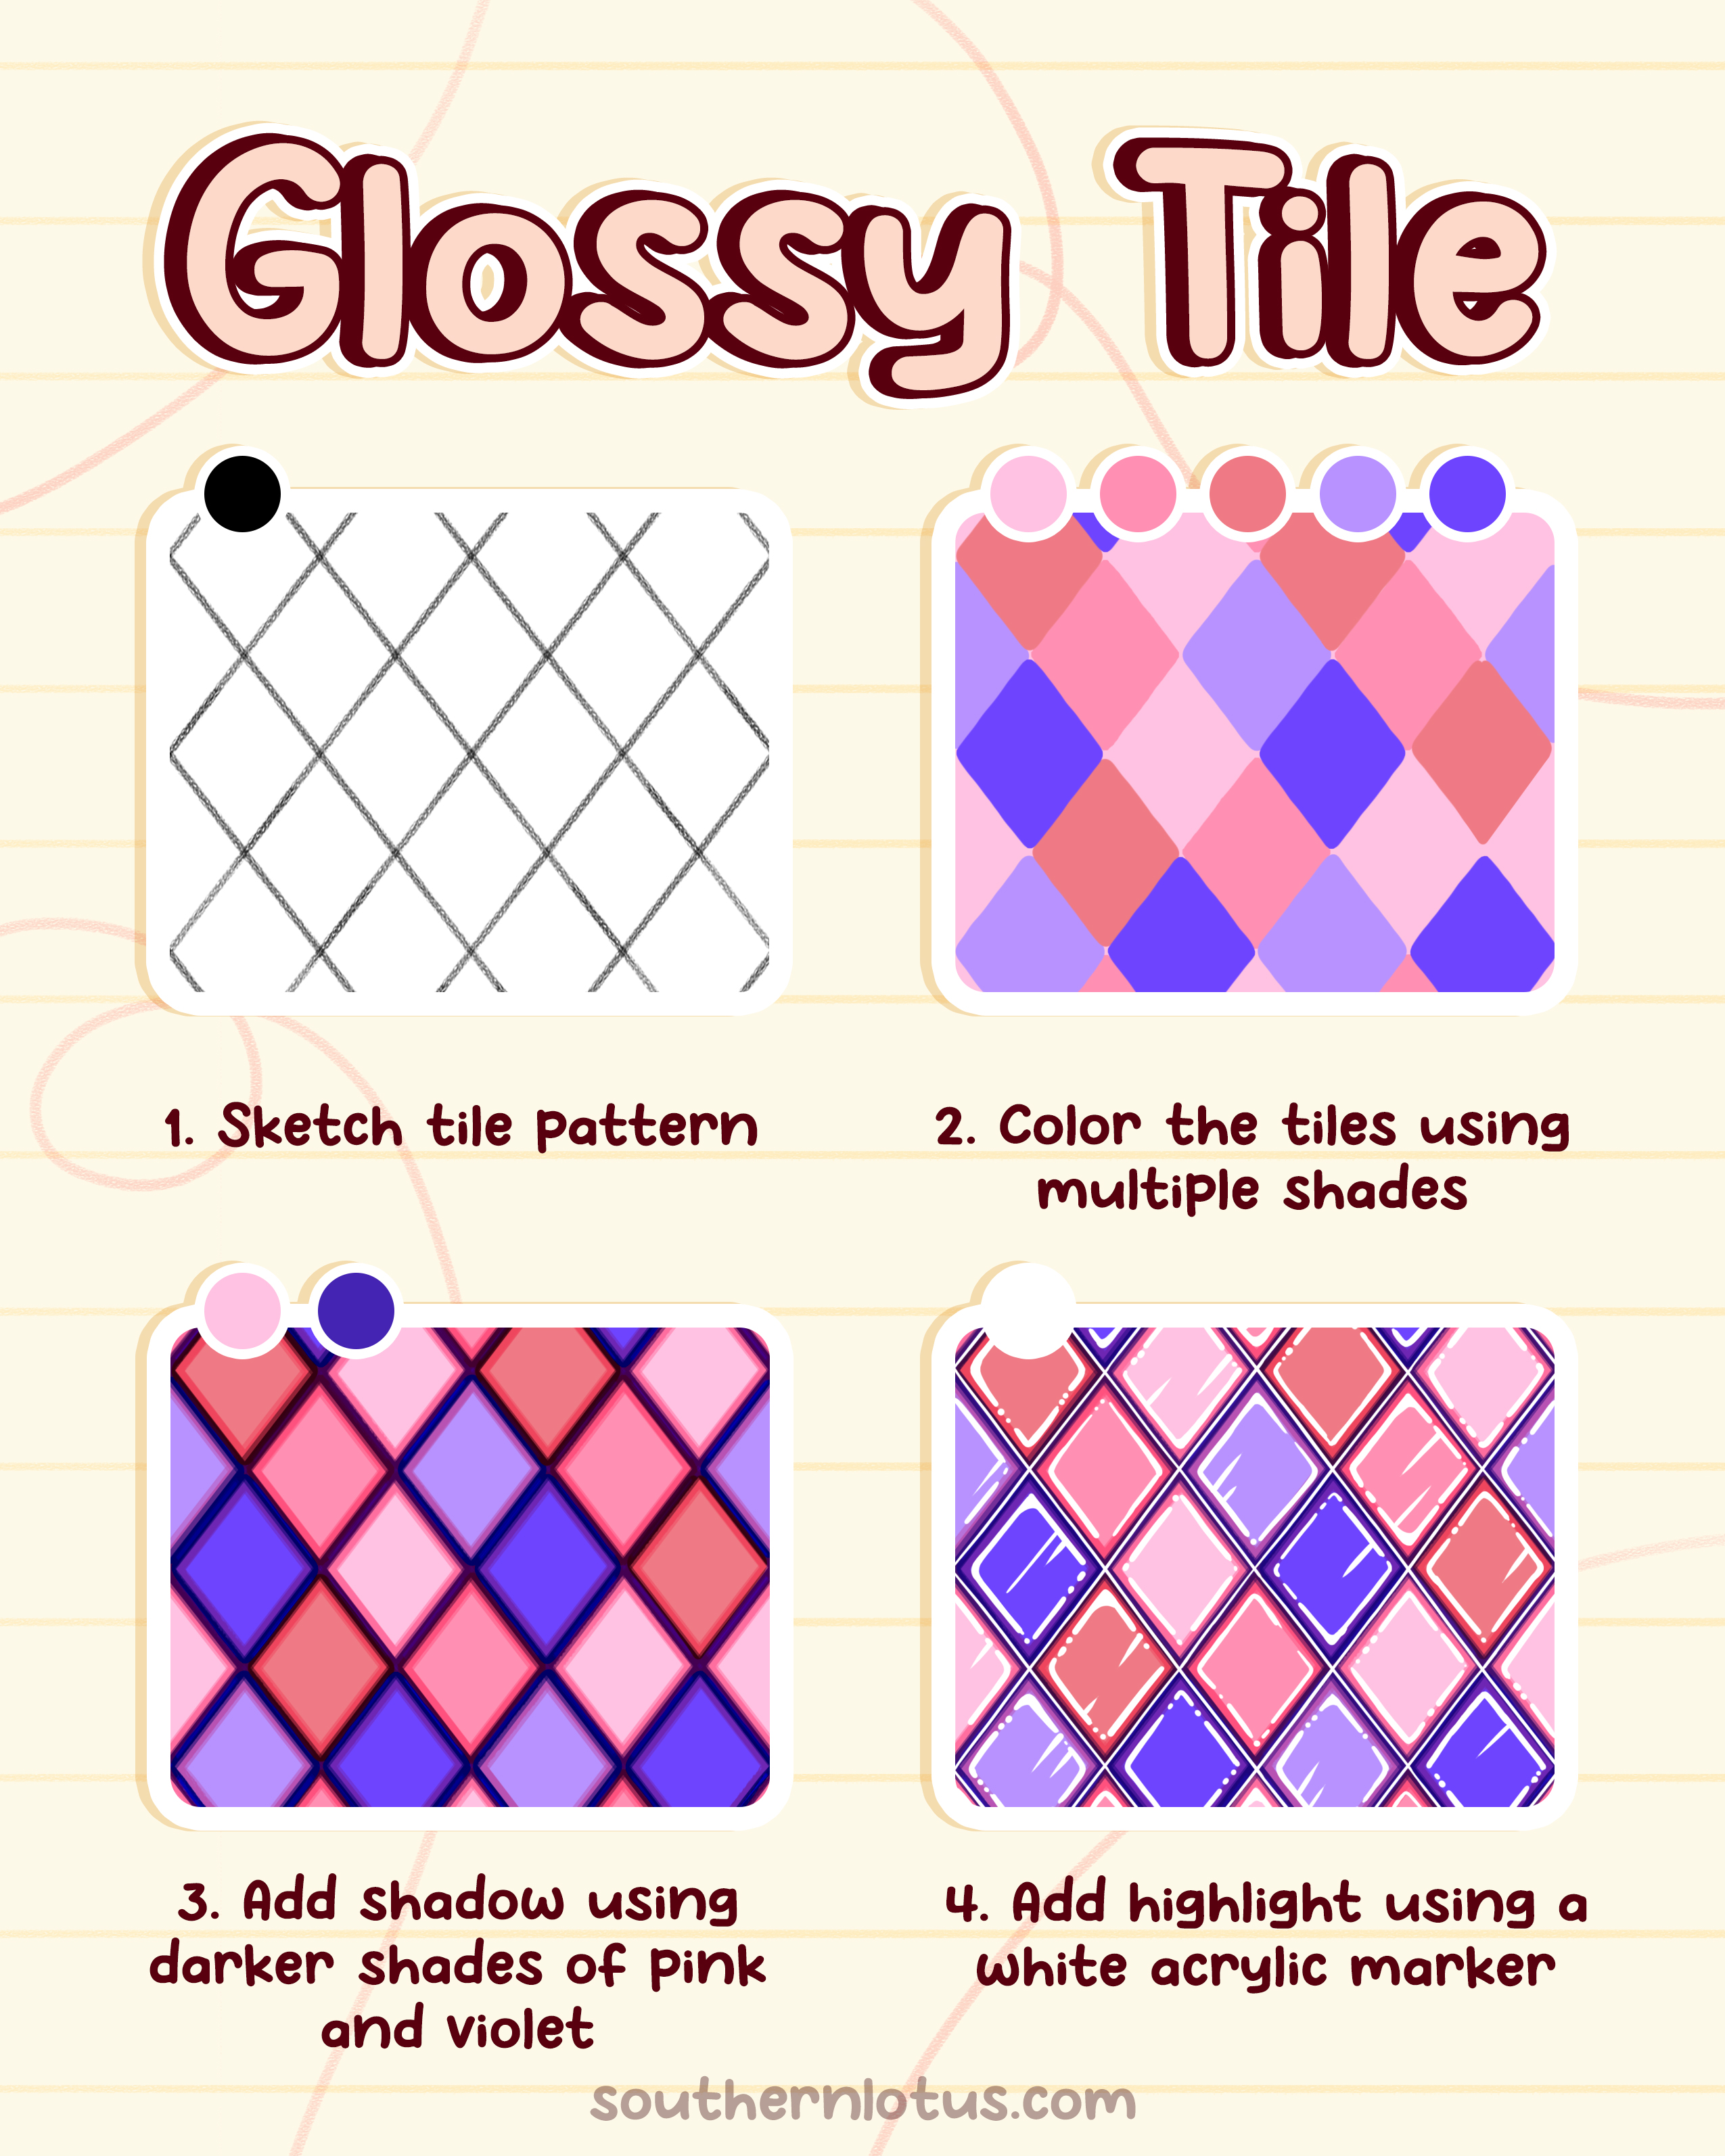
Step 1: Begin by sketching a regular geometric tile pattern, such as diamond shapes or staggered squares. Ensure the lines and angles are sharp to create a modern look.
Step 2: Similar to brick, use various shades of pink and purple to color the tiles alternately, avoiding monotony.
Step 3: To give each tile a 3D appearance, use darker shades of pink and purple to add shadows along one edge of each tile (for example, the bottom or right edge).
Step 4: This is the key step for achieving the "glossy" look. Use a white acrylic pen to draw sharp and clear highlight lines along another edge of each tile (for example, the top or left edge).
A wall filled with Xmas spirit will instantly bring the joyful, warm, and magical feeling of the holiday season.
Bright colors and characteristic patterns will make your artwork sweeter and more lovable, perfect for Christmas coloring page.
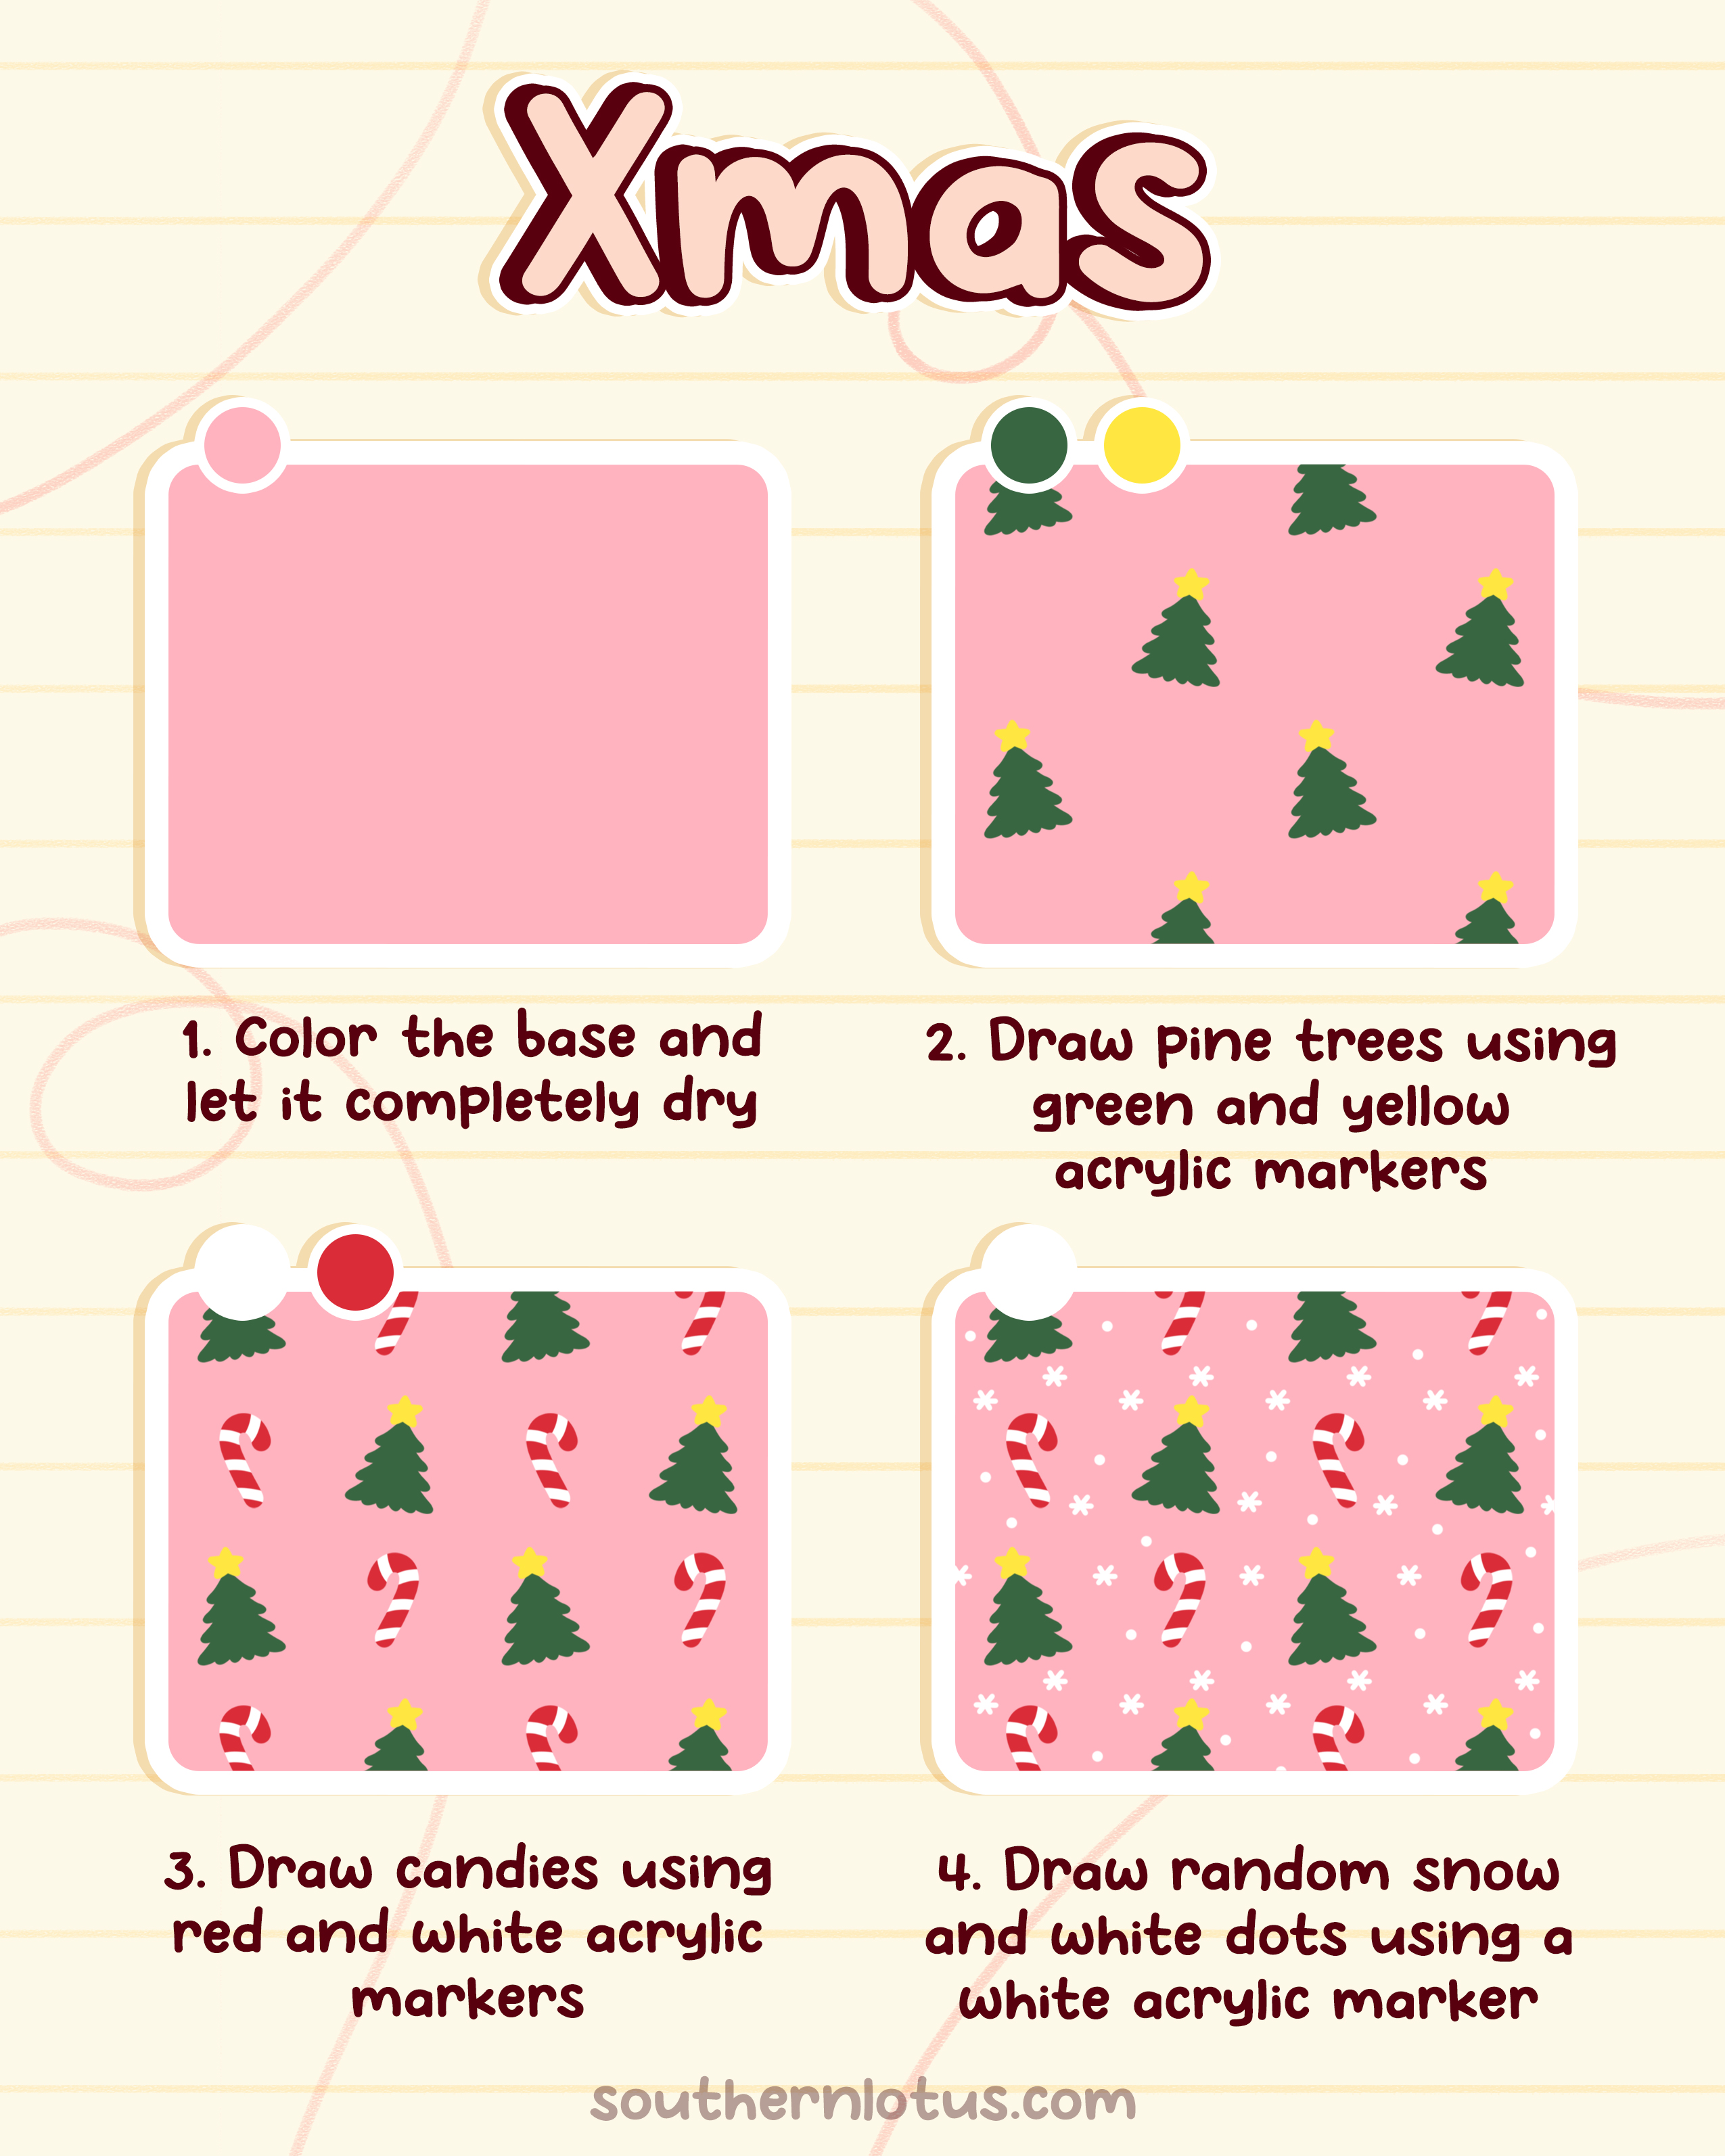
Step 1: Color the entire wall area with a cool, soft light pink or pastel pink.
Step 2: Use a bright green color to draw small, randomly scattered Christmas trees on the wall. You can add a small yellow dot at the peak of each tree for a star.
Step 3: Use red and white to draw candy cane patterns in a 'J' shape or a spiral. Scatter them alternately with the Christmas trees to create balance and variety on the wall.
Step 4: Finally, use a white acrylic pen to draw small, tiny snowflakes or random white dots across the entire wall. You can create dots of different sizes to simulate falling snow or sparkling light.
Immerse yourself in the natural and rustic beauty of a stone and moss wall texture. This wall style evokes images of fairy tale forests, abandoned ruins, or a mysterious garden.
It brings a sense of peace, closeness to nature, and a touch of mystery.
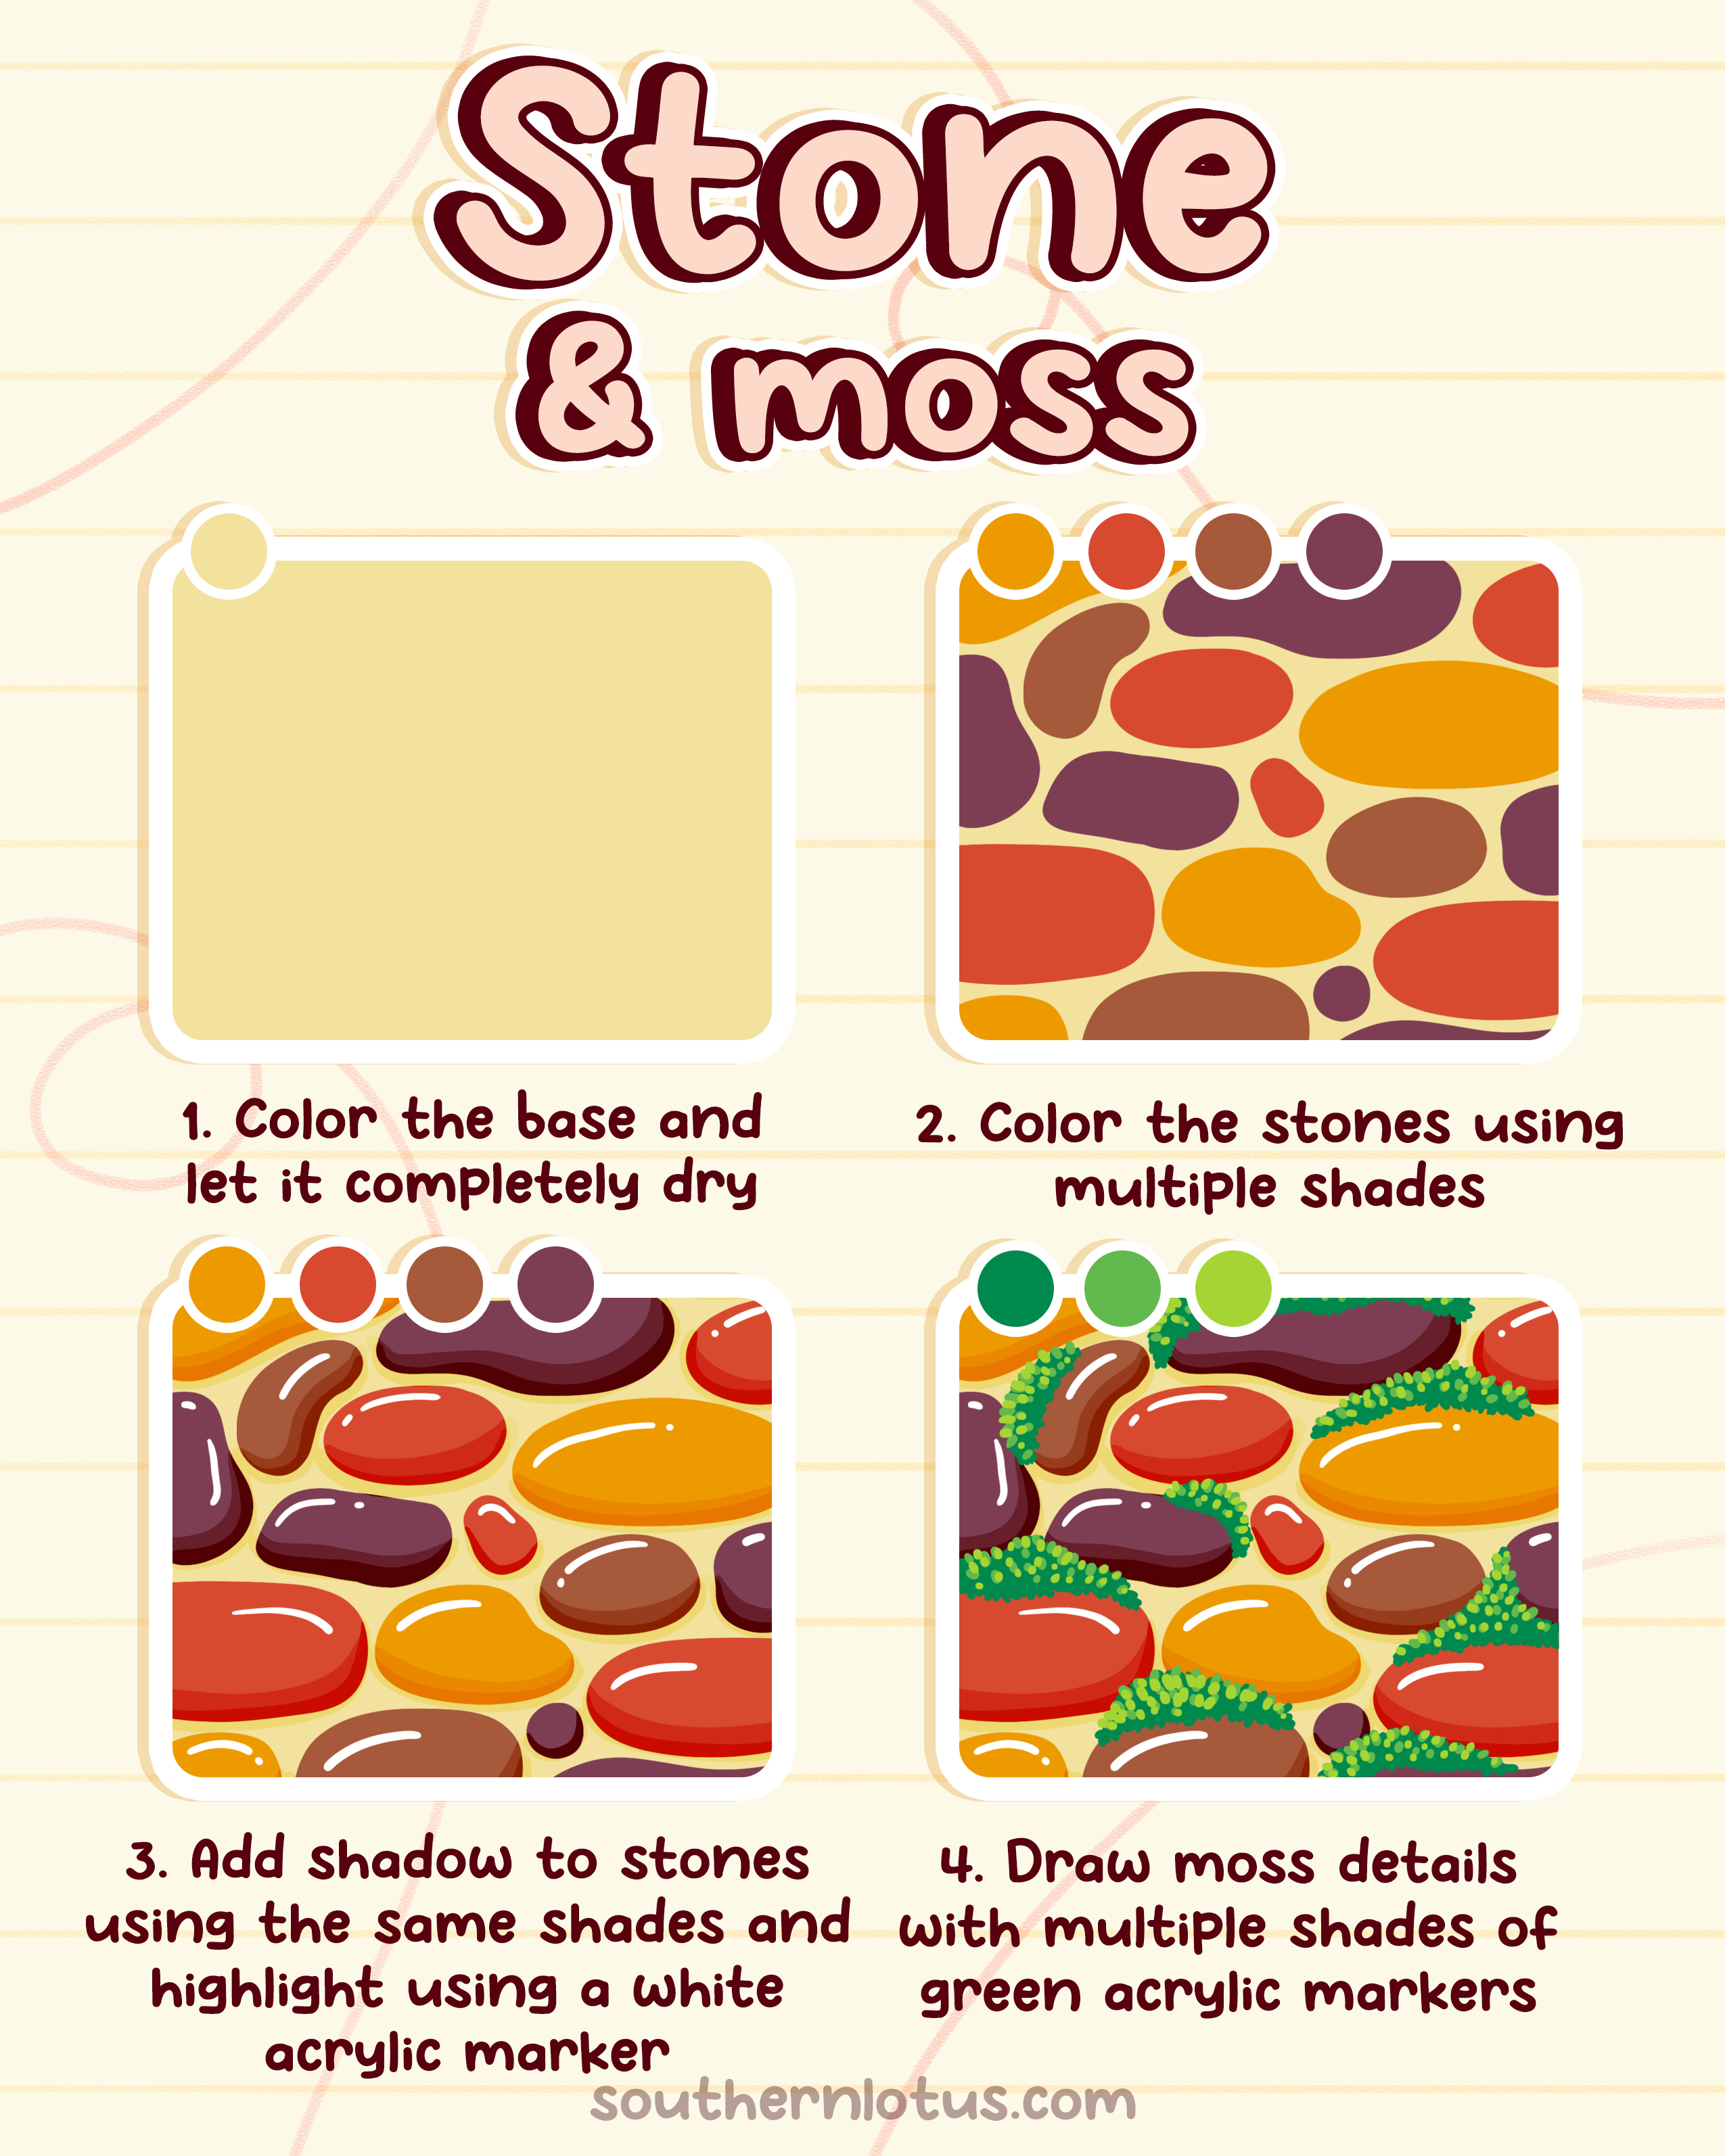
Step 1: Color the entire wall area with a light yellow or creamy beige.
Step 2: Draw random, irregular stone shapes and color them with various warm shades: burnt orange, brick red, earthy brown, orange yellow, and perhaps a touch of deep purple or moss green for variety.
Step 3: To create depth for each stone, use a darker shade of the stone's color to add a shadow on one side or the bottom of each piece. Then, use a white acrylic pen to create small bright spots on the convex surface of the stone, helping them look rounder and textured.
Step 4: Draw living moss details: This step brings the wall to life. Use various shades of green (dark moss green, bright green, chartreuse) to draw patches of moss. You can draw moss clinging to the stone surface, creeping into the gaps, or even forming small, soft clusters.
Which wall style will you choose to transform first? Experiment with these techniques and share your wonderful artwork!
Enter your email to get our special. Gift straight to your inbox.